Welcome to my creative online journal

Sunday 31 January 2010

Love Laugh Create

I'm using yet another bargain I got from a charity shop recently, its a set of 3 make-your-own keyrings that cost me 50p!

Embellishments for bags and phones seem to be in the moment so that is what I made:


I put all 3 keyrings onto one rings, just wrote the words onto some beautiful handmade paper and put the paper into the plastic keyrings. 

This is what they look like individually:
and this is what they look like on my rather dull black bag:

Brightens the bag up and I can change them anytime I fancy something different!

Month Look Back

Thought I'd sneak an extra post in today, looking back at all the stuff I've made this month.

Here are some compilation photos:


What a busy month!  Phew! I have NEVER done so much crafty stuff before!  And this is my first ever blog.  I do hope you are enjoying seeing what I'm making (you're being a bit quiet!)  Please comment,(hopefully favourably).  I'll do another post today (later) and let's see what crafty stuff next month will bring!  

Saturday 30 January 2010

Creative Companions

For today I have made a craft suitable for children to make:
No Sew Material Heads!

I thought I'd try my hand at a step-by-step demonstration, these are so EASY a child could almost make them by themselves, if they are able to cut material out, that is.

I should point out that these aren't my own invention, they came from an Usborne Activity |Book called 'Recycling things to make and do'.  I do like to recycle and reuse stuff, and  I think its very important that we all do our bit. 

To make the one on the right:

1. First of all, draw around a small plate on a piece of material (doesn't have to be ironed! lol) and cut it out.  Then scrunch up a page from a magazine into a ball:
2.  Put the magazine ball in the middle of the material circle and gather up the material around it.  
3. Secure it with a rubber band:
4. Cut into the material above the elastic bands for hair:
5. Add eyes using wobbly eyes or buttons and a mouth using a bead or cut one out from cardboard.  Glue into place....
..and voila!  One slightly strange monster to watch over you when you craft!:
Vary the materials for different kinds of 'monsters'.

(Remember not to give these to little children, they could choke on the buttons or beads)

EDIT:  Also spot the deliberate mistake - the material on my demo one is inside out! oops, lol

Friday 29 January 2010

Just a Note

Today's project was a nice simple thing to do, but fun:
A Coaster Notepad

Its a bit like the Important dates calendar I made earlier on in the month, but this one is a notepad.  Its just a beermat (uncovered, you can't see it) with a sticker with a rubber stamped 'Just a note' stuck onto the bulldog clip.

On each of the notes I rubber stamped a message and coloured in some of the letters with coloured pens:


(You don't need to rubber stamp the messages, just write them)
This can be just left on desks or tables, maybe by the phone, or something else to pin on the noticeboard!

(These handwritten rubber stamps are of unknown origin, bought a while ago in a charity shop, bulldog clips were £1 for 6 from the pound shop)

Thursday 28 January 2010

Cartoon Caricature

I don't very often do cartoons these days, but when I was little I used to  loved making up my own characters.  When I blog hop I am always seeing characters that have been rubber stamped and coloured in by the blogger and often think I would like to be that someone that invents those characters.  I wonder how you go about getting your drawings into the rubber stamp market?

Anyway, today I decided to have a go at  my long lost hobby of drawing as my craft.

Something I didn't do when I used to draw cartoons was caricatures but when I saw this year's school photo (they don't have to wear school uniform!) on our mantlepiece, I thought I would give it a try:

Here was what I did:

Poor Joshua (on the left), I know you're meant to exaggerate features but I think I got a bit carried away with his ears!  Oops...   Actually, Ryan's ears aren't right either..or his hair!  Never mind... .

This drawing doesn't seem to be much of a caricature, its more like a colouring book page, which is fine in its own way I supppose... Its also not like the cartoons I usually/used to do (see my Jan 1st entry) which  I think is the type I will get back to doing more of  soon...

Wednesday 27 January 2010

Transparent Frames for Valentine

Phew!  My hands have been aching today because I have been manipulating wire around some frames with the wrong tool!  Don't laugh but what I grabbed from my husbands tool collection in the cellar were some secateurs rather than pliers - and wondered why I was having such difficulties.  (One of those infamous blond moments without being blond!)  Doh!  I did realise when I'd all but finished...
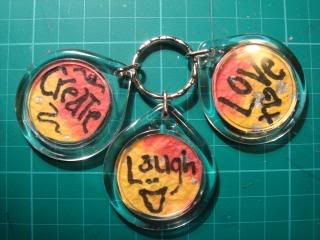
I was making these:

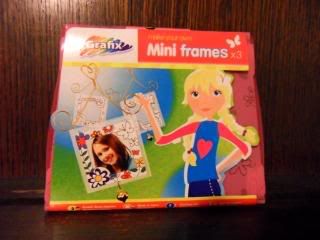
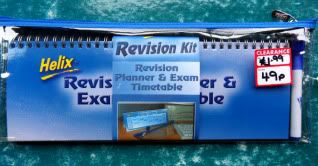
They were another of those cheapy craft sets from the local pound shop made by Grafix. These were called 'Make your own Mini frames':


They provide plastic squares (which you stick your photo onto the back of, not inside), the heart wire frames and some mini heart embellishments. (They also gave you some paper frames to colour in and some crayons, but I didn't bother with them).  There were also some small bits of wire to hang all the bits together, which you twist into shape.  I have to tell you I could never be a jewellery maker, I took AGES trying to put these rings on, but that may well have been because of trying to use the wrong tool.

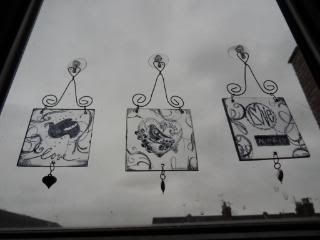
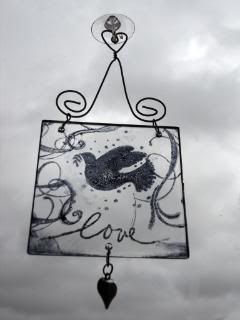
The suggestion is to display photos on them, which I did consider, but thought I'd make the most of the fact that they were transparent so would look nice as a window decoration.   Which lead me onto rubber stamping...  I'd got the bird stamps free with 
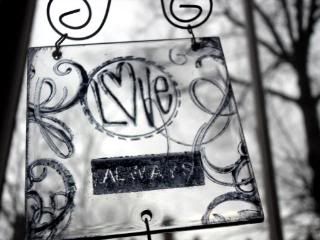
'Craft Stamper' magazine a while ago and had never used them, so here was my chance.  I added some Clear Impressions Love stamps to go with them and my favourite, some swirly flourishes. I used Stazon ink as it stamps quite well onto plastic.


To put them on the window I have got some rubber sucker hooks which are great for lightweight materials.  I first spotted them in shop window displays around Christmas, they were used to stick baubles onto the windows.  I was rather pleased when I noticed my local docrafts shop stocking them and so now I can stick all manner of things (lightweight) on to my windows!:

You could also hang these up or simply pin them to a wall or noticeboard - and change the colour of the background if you wish.  Or maybe  you could give one -or all of them- to someone else as a gift in a nice box.

Tuesday 26 January 2010

The end of the year

Woohoo Finally Finished!  Yes, the calendar I mean.  I've never done anything like this before so didn't know it would take this long, well I know now!   And yes, this last page has got lots and lots of shiny sequins on it too!:


One of the things that took so long was sticking each and every one of the sequins in place.  They may not look carefully placed but I assure you EVERY ONE was moved and shifted about at least a dozen times, looking for its perfect 'parking place!'  Not to mention the amount that kept trying to escape! I reckon I recovered half a box of sequins from the dining room floor and no doubt will keep finding many more in the weeks and months to come! 

This last page came about because I wanted to do a subtle representation of November (fireworks) and December rather than the obvious, even though both  are very visual events you could do a  lot with.  I also decided to tie it in with what I've done on the other pages.  November got an explosion of lots of colours and flower sequins representing firework bursts and December just got lots of red, green and gold. 


I like the end result (and think it looks better in the flesh than in the photos I've put on) but will be glad to be doing other stuff now, without sequins!

Monday 25 January 2010

Rich Autumn Gold

Y'know some days aren't going to go to plan, like when you wake up in the morning and discover to your horror its 10 minutes to 9 and your kids should have been in school 10 minutes ago!!  Yep, that is exactly what happened to me this morning, and what can I say but ooops the embarrassment!...  Lesson learnt, keep that mobile under your pillow and set it on vibrate, foolproof! (er, maybe!)

Anyway, other things didn't go to plan either, including my plan to do lots of crafting today.  I only managed to get one more page of the calendar done, the page for September and October:


I think its one of my most favourite pages out of the whole calendar, could it be because it has swirls on it?  Probably. First of all I stuck the orange paper down, then rubber stamped in brown a tree leaf on it (yes I know I said no rabbits for April but leaves are more swish, OK?  lol)  I then got out my swirly stamps and  heat embossed them with a lovely rich gold (ideally I should have rubber stamped the swirls and embossed them before sticking the page into the book because the spirals got in the way but then it was that kind of day!)  I finished off with sticking the letters down with my glue dots, which have now RUN OUT!  How will I be able to complete the last page tomorrow? Panic! :-o  Are there any shops open at 5 minutes to 12 on a Monday night that sell glue dots?...

Sunday 24 January 2010

Glossy accents and Sunshine!

Was hoping to finish the calendar today, its not quite finished, but very nearly there.  I realised I hadn't shown you the title page, This I modified today by adding some Glossy Accents, a crafter's wonder product that changes a flat object into a 3d one. I used it on the numbers so it would match the embellished glossy flower stickers.  The numbers were made using the Grungeboard letter template onto the same papers I used inside and I handwrote the stitches again to match the inside pages:


I made the page for July and August today, again using my stash of sparkly gems.  I even discovered some mosquito gems that I didn't know I had.  I kept the theme to a bit of orange and lots of yellow/gold to reflect all the sun we're going to have this Summer! (lol)


Once I'd  completed putting all the gems on it again lacked something so I had the ingenious idea of adding some flight lines for the mosquitos.  I used the broken line technique I'd used for the letters and it worked so I then decided to change all the flowers into 'suns'.


I have added all the papers and calendar months to the last few pages so shouldn't take me too long to finish tomorrow, I might even have chance to do another craft!

Saturday 23 January 2010

Sequins, Sticky Dots & Bling!

I have been continuing on with the calendar I started yesterday.  I've done a March & April page and a May & June page today.

The March and April page I separated into two colours, grey and yellow.   I had a vague idea to put Easter embellishments on the April side and did for a while, but then hurredly took them off - they looked really naff!  After all, this calendar isn't intended for the kids, its for me (and maybe my husband!) so no rabbits allowed!


I kept to the same layout as the previous months with fake stitching and paper letters and for this one embellished it with lots of sparkly sequins.  I have to say how I appreciated the sticking power of my roll of sticky dots, all the sequins stuck on with no problems.  It really sparkles, hope you can see that in the photos:


The March side I kept to blue and silver sequins, which 'spilled over' into the gap between March and April


...and for April I kept to golds and orange sequins, very lush!

For May and June I went the flowery route.  I'm not a flowery prerson normally but I did want this calendar to at least reflect the seasons.


Initially I just had the felt and button flowers but there was something missing in the gaps.  So out came my massive box of sequins of every description that I impulse bought from QVC a while back.  It gave the page a lift & shine in a way that only bling can.


Loved the mixture of typefaces!

Think I know what tomorrow's task will be! 

Friday 22 January 2010

A Late Desktop Calendar

Today's project, which I have only had chance to make a start on, is a desktop calendar.

I didn't make it completely from scratch, I managed to get what was called a 'Helix Revision Planner & Exam Timetable' in the Ryman's sale recently for 49p rather than £1.99.   It's useful because its already got the 'standy up' mechanism on the back and it was spiral bound (it also came in a zipped plastic case with a wipe on wipe off pen):


As I said, I've only started this, I've done the title page and the first page featuring January and February. I'm recovering all the pages in paper I got from a children's scrapbooking set in Ikea.  For the lettering, I've used different typesizes of  alphabetical grungeboard as a template onto plain white paper.  Grungeboard itself is a flexible cardboard, which is very strong smelling, it smells like the inside of a pet shop!  I've handrawn faux stitching around each letter and around the whole page which has given it a 'material look.':


I added my 3d glitter snowflake stickers and some heart confetti, stuck on with glue dots.

Detailed photos:


Related Posts with Thumbnails