Welcome to my creative online journal

Wednesday 31 March 2010

Watering the Flowers

I can never tell where I will get my ideas and inspiration for doing my daily craft, sometimes it just 'comes to me!'  This one happened whilst I had the shopping channel, 'Create & Craft' playing in the background on the TV the other night (I don't buy stuff from them, their postage costs are very high, unless they have an offer on).  Anyway, I digress.... They were promoting the lovely Sakura pens and the man that was demonstrating was using a water brush to add shading, like watercolour paints.  I thought, 'ooh, I've got one of those brushes, and some Sakuras in the back of beyond somewhere, I'll dig them out.  So thats what I did. 
In daylight and with my glasses on, I can see the errors, but I'll give it to my mother-in-law when she hasn't got hers on (he,he) and I'm sure she'll appreciate it.
(Think I'd better fill in some 'missed bits' first though, macro lenses on cameras are unforgiving!)
(They are peel offs coloured in using Sakura Stardust Pens and a Water Brush)

Today I thought I'd also show you one of my older son's 'crafts' whilst he's been off on his Easter Holidays:
The Simpson's sofa is made out of building blocks. (The Simpson's dolls are from 'The Works')  They can now watch themselves on their own sofa!  :-)

See you tomorrow

qwiksave x

Tuesday 30 March 2010

Altering Time

Another of the crafts I did when I've been off was to alter my kitchen clock.  If you remember a previous ranting post I made a while ago, I mentioned how I wanted to alter my plain, white kitchen clock:
Here is my 'offending' item, just waiting for its transformation...
I took the plastic cover off, distressed round the outside edge with Stazon ink and then stamped the gears into the centre....
..I also inked the inner rim of the clock with a permanent marker..
.
..and there you  have it!

I also added more distressing (ink) to the plastic glass front but it made the clock look more like a dirty workshop clock than a kitchen clock so I wiped it off again. 

I should point out that my house is of the old Victorian type, rather than a modern new build, so it lends itself more to the grungey messy vintage look.

While I'm on, I thought you might also like to see the finished altered bag that I have finally completed:

All I need now is a fun night out to take it to now!
Dazzle, dazzle.

See you tomorrow!

qwiksave x

Monday 29 March 2010

Metallic Pens and Water

My husband came in the door from 5 weeks working in China today (not yesterday as I thought) and came back with his gleaming new working laptop - what a warm welcome I gave the computer him! 

I haven't had time to put all the bits and bobs I've been doing the last few days so here's a taste:

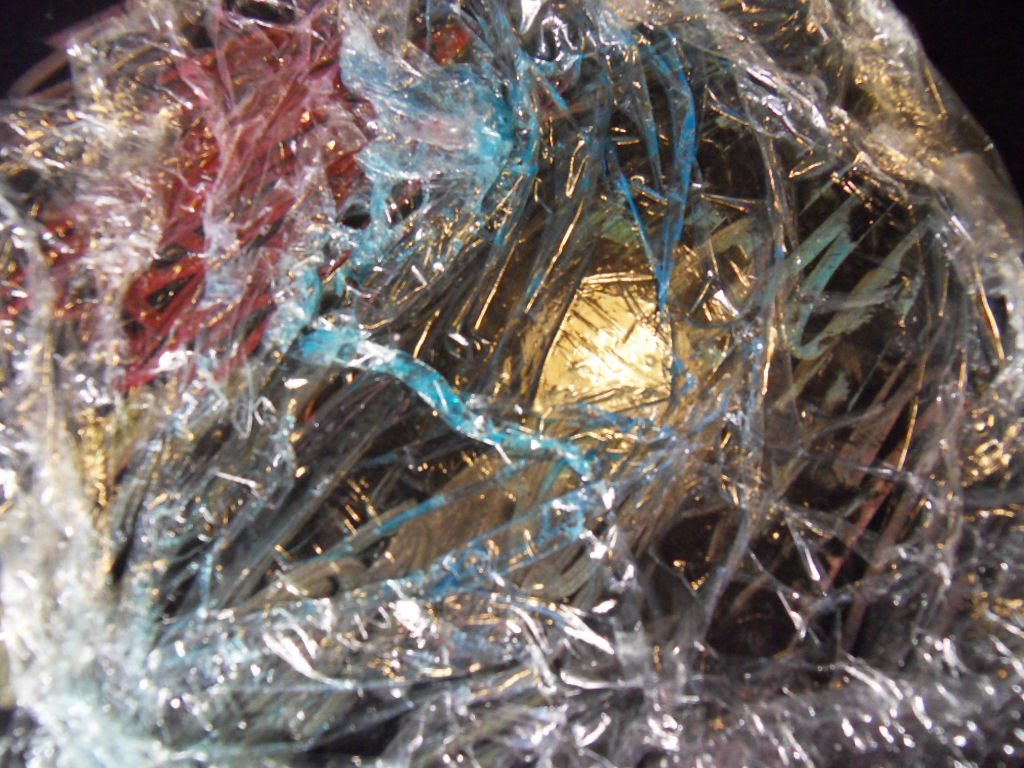
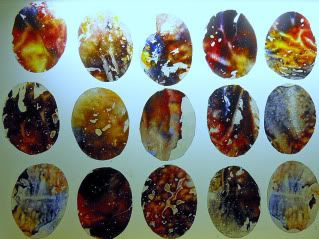
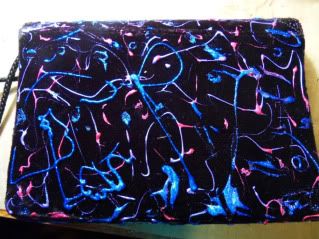
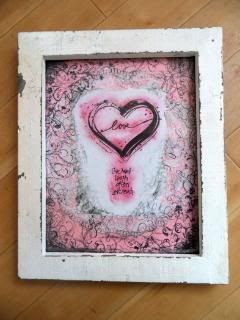
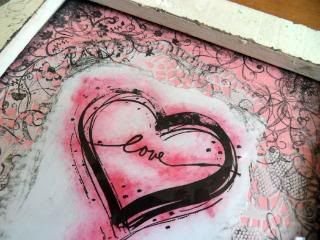
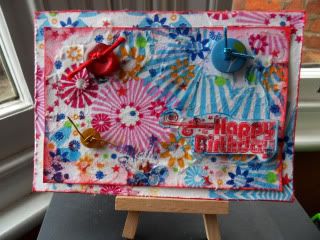
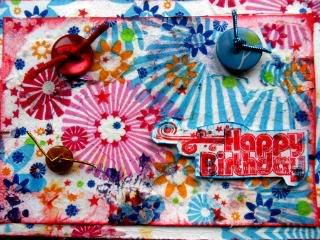
This was the experiment I was making the other day, that didn't quite work but looks quite interesting so I thought I'd show you:
I used a library book, written by Suze Weinberg (of 'Melted Pot' fame) called 'The Art of Rubber Stamping':
(Incidently her current blog is great!)

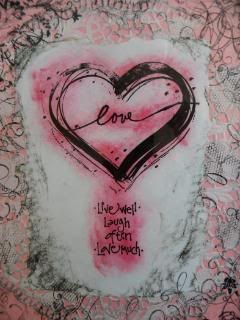
It's a great book, albeit written AGES ago (in the year 2000!!)  with some fab ideas in it. This idea was to scribble metallic markers onto glossy black card and then squirt them with water to blend them. As you can see, in this first example the markers I used wouldn't blend -doh! I think I was meant to use a water soluble type.  On to Try number 2:
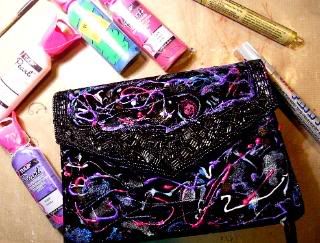
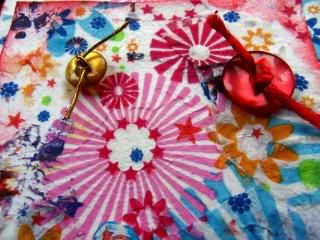
Only some of the markers blended!  But I did the next stage anyway:
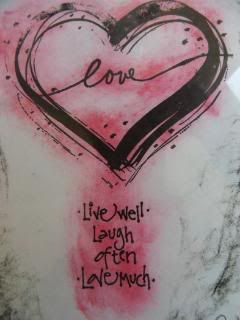
Putting cling film on top, scrunching it up and then leaving it to dry.

Unfortunately, I can't show you the results of this because they are long gone - in the bin - for some reason it didn't work.  It was meant to leave a lovely textured finish that you can use for card backgrounds but mine didn't work.  Feel free to have a go yourself and hopefully you'll have more success than I did.  

I thought I'd show you anyway as not everything we do is going to work, as thats the nature of life (and blogging!)

It is, however, great to be back here in Blogland (I've missed you!) and I have done some successful crafts that I will share with you in extra posts over the next few days.  

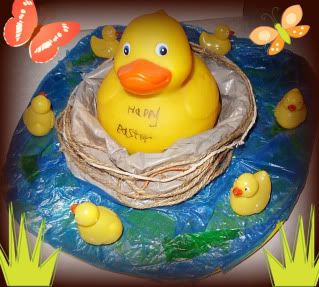
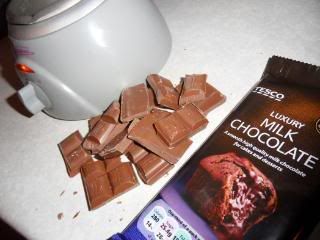
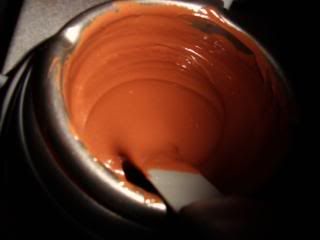
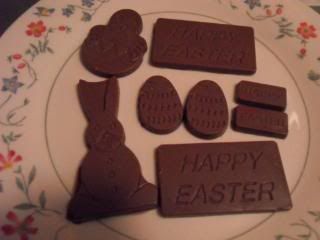
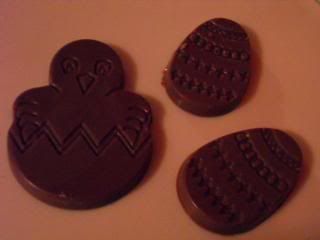
Meanwhile, and inbetween doing that, I'm going to be busy, entertaining my boys (and husband) as its their Easter Holiday.  Hopefully some of it will involve crafting and some of it will be chocolate related! Mnnnn...

qwiksave 

Friday 26 March 2010

Computer Meltdown!!

Sorry for not doing a blog entry yesterday, but I have severe computer problems!!  My laptop has died since my darling older son decided to play a 'chase the magnet' game with some very strong magnets under and over the coffee table where my laptop was!  The laptop is now refusing to start!  Our Home PC has also suddenly got itself a virus so Sky have suspended the account until we restore the operating system.  My husband is coming back from China on Sunday so I am hoping he can fix both computers.

I'm writing this from our local library today (Friday) but I can't put pictures on it (boo!) but I'm still crafting daily (hooray!) and will show you what I've been doing in my absence as soon as I'm back - Hopefully Monday.

It's very frustrating not having a computer when you are as obsessed as I am and I am missing looking at all your wonderful work too.  Hope to see you soon.

qwiksave
x

Wednesday 24 March 2010

Shopping!

Thought that would get this blog noticed! We crafters do like our shopping! :-)

I haven't done a shopping post in a while so here is a result of today's little expedition.  It wasn't as fruitful as my previous haul (lol), but that is the nature of charity shop shopping, you can't always guarantee you'll get what you want. 

I got a strange mix of things today:
First of all, I got this rather nice Treat tin (Front & back views). Its a Nigella Lawson one apparently, for a pound. 
Then I got these dressmaking kits for 25p each.  I'm not actually going to make them, I'm just going to use the dressmaker's paper as a background on a candlewax canvas picture (a tip from Claudine Hellmuth  book, bought previously)
I also got these tattered old bricks for £1.25.  Thinking I might alter and put pictures on the blocks.  Some of them have got some writing on them already so I don't feel too guilty...
This was the book of the 'best of her magazines.'  I don't get her magazine (its about £4 I think) but this thick book was only £1.50 so I thought I'd give it a look.
These were bought on a whim, for the kids - they are hand puppets with BIG mouths! £2

...and these were some lovely photo corners and holographic stickers from Paperchase. The stickers were great at only £1 each....

and finally, something I didn't buy:
This was an enormous horses head and mirrored body sculpture spotted in Lee Longlands window, costing hundreds/thousands!

I have done a craft today but its 'not ready for my audience yet' (ark at me!), I'll show it tomorrow - if it works!....

Tuesday 23 March 2010

A Hat, 15 Eggs and a Bag

Today I have been finishing off previous crafts like my wax crayon eggs from yesterday and my abstract evening bag from the day before.

Before I show you how those are doing, I thought you might like to see the Easter Bonnet I made with my younger son last year:
It was made from a yellow plastic children's Fireman's helmet.  It has green and blue tissue paper on top of ripped up blue plastic shopping bags that were stuck around the rim with PVA for the water effect. I We used a brown plastic bag for the nest with string & twine glued on.  The little ducks are actually painted novelty ice cubes!  All of the ducks were stuck on with strong glue dots.  

I didn't put the egg pictures I made yesterday in an art gallery (strangely enough), they were a bit brittle, but I did cut them out into egg shapes.  When we eventually get some sun, I'll stick  them onto a window:
(These were photographed on my light box)
 

Again, the fabric paint on the bag is not dry (oops!) but it gives you some idea of the pattern I put on the back:
The blue has lots of glitter particles in it.  It really does look quite dramatic and I do fancy using it now (when its dry!) I could wear it with a plain black dress and maybe make some equally dramatic shoes to match...

See you tomorrow

qwiksave
x

Monday 22 March 2010

Wax Art

Earlier on  this morning the sun was shining and it was positively Spring like. I found a project on this blog that I thought would be great to do to show off the sunshine.  The project was to make some egg shapes out of melted wax crayons and display them on your window in the sunshine.  This would have been good but by the time I'd finished the project the sun had gone away and it was pouring it down!

Here are the results of my egg making!  Truly glorious colour pictures that I haven't cut up into egg shapes yet as I'm thinking of displaying them in a modern art gallery instead! lol:


(To see individual pictures hover your mouse near the bottom of the screen, pause it and then press the forward button) 

A few tips I learned: 
Put the wax crayons in a dish of warm water to help soak off the labels, and don't use decent sharpeners (it wrecks them). You'll also need something sharp to unclog the sharpener regularly.  Expect sore fingers from all that sharpening and don't use that sort of Travel Iron, it doesn''t get hot enough!  You will need to use loads of  kitchen roll and an old teatowel  as it's very messy to do and I personally wouldn't get kids to do it.   Bet you can't wait, can you?....

qwiksave
x

Sunday 21 March 2010

Comfort Zone Bag

Today's craft will be one of those that you either love or hate! Its one of those that was done with gay (am I allowed to say that?) abandon!  Just get the materials and slosh, scribble & squeeze them on.  Don't care how its looks just put them down.

I spend hours looking at other people's blogs and see how some people are so brave in the kind of things that they create.  It is very easy to 'play safe', and not venture out of your comfort zone and I know I do that a lot.  I have loads of  art materials, equipment and embellishments that I am too scared to use or am saving to use on that 'perfect' piece of work (which never seems to come!) So today I decided to alter something in a very random way, freeing myself of that self-imposed restraint.

I had a velvet evening bag that I never use with some beads on the front:
I knew it wouldn't matter if I didn't like the end result because I never use the bag anyway, so haven't really got anything to lose. 

It's not dry or finished yet. When its dry I intend to tackle it some more.  I do like the vivid colour mix of the purples, pinks and blues, and it looks even more dramatic in 'real life'. 

I'm just pleased that I came out of my 'comfort zone' for the time I spent doing it, it felt good to do that (and now I'll sneak back in again! lol...)

See you tomorrow,

qwiksave
x

Saturday 20 March 2010

Ummmm Choccie!

What a quiet weekend I am having. My boys have gone to their grandparents (my inlaws)  for the weekend and my husband is still working away in China.  I'm not used to all this quiet (well, as quiet as one can be living on a main road), but it has given me too much time to 'think'.  The only voices I'm getting now are the ones in my head, the ones saying 'isn't it about time you tackled that humongous ironing pile?' and the other one (?!) saying, 'nah, I'm too busy being creative!'....

Today, I decided my craft would be to make some choccies!  With my boys being away, I have been able to make the choccies in peace and lick the bowl out afterwards and without 'help'.

I have a Russell Hobbs Chocolate Treat Maker to assist me in my task:
which melts the choccie in the first place and then keeps it warm while you put it in the moulds:
You just stir it occassionally.
These are the set of moulds I got, from a local delicatessan shop
Do excuse the mess! After putting the choccie in the moulds you shake it gently to make it smooth and get air bubbles out.
Put them in the fridge for about half an hour and then turn them out.
Happy Easter!

Yes I know its early but these won't last that long (munch!), I'll make some more for then! :-)

qwiksave x


Friday 19 March 2010

Spread a Little Happiness

After I made the picture yesterday (and redid it today!) it occurred to me what a great idea making pictures for yourself or other people is.  It can also make an extremely good moneysaving present!   That frame I got yesterday was only 50p, so they really don't have to cost much at all. 

There are so many different things you could put in them too.  While I was clearing out our attic I found a pile of frames that I've accumulated and in one of them I found this lovely piece of writing that had been written by my husband when he was only about 5 years old!

(Click to enlarge)

It says on it:
My Records

(Ignoring the numbers down the side) I have 4 records 1 is Rupert and the Fire Bird and The Jungle Book and TV Cartoon Themes and The Owl and the Pussycat and Run Rabbit Run and I took it to school to play it on the School Record Player in the hall.  We did Musical Movement.

I like drawing aeroplanes best. Big aeroplanes fly fast in the air.

...and on the back are some handrawn pictures of dragons!:

My two little boys loved seeing the writing and drawings their daddy had done about 40 years ago!

It all depends on what type of things you may have but it made me think..  What other artefacts/bits of history could we put on display in frames?  Interesting things that we have from our pasts that tell a story, old letters that spoke of what life was like then... I've still got some pen pal letters from my teenage years, they may have bits in them that reveal to my sons what life was like in the 1970's....

But don't keep them to yourself! Put them on display (scan or take another photo of them if you want), let others see a part of you they don't normally!  Also, don't forget to give this sort of thing as gifts for Birthdays and Christmas, maybe to your siblings or parents.  If you present it nicely I can bet they'll appreciate it much more than something you've just plucked off a gift shop shelf.

Have a great weekend,

qwiksave
x

Thursday 18 March 2010

Love in a Frame

Today's project is different from what I originally put on yesterday because I changed it this morning (Friday) .

I was quite pleased because I had got myself a lovely distressed looking frame for 50p from my usual sources - I don't know whether it was meant to look distressed or was genuinely old, but I think it was the former, because there was quite a swanky looking label on the back, y'know the type you see in 'designer' home shops.
This was the frame..
...that came with this print in it.

Yesterday I made a project with some pink flowers in it, but I really didn't like the end result so  I changed it to this:
I did my favourite technique of inking the edges and corners with Black Stazon and stamping with assorted flourish stamps:

Under there (on top of the pink background paper) I have also stuck a white doiley which I have rubbed with a black wax crayon to bring out the texture.

The heart and rubber stamped message I had done previously, using chalks.  I just ripped around the edges.
It's a lovely sentiment and the whole thing looks perfect in the distressed frame.  At a later date I may distress the frame even more.

All in all a much better result than the flowery picture I made yesterday! :-)

qwiksave x

Wednesday 17 March 2010

Orange VW

I'm finally allowed out! Not just out of the attic space which is going to take weeks to sort (!), but out on the town on Friday night.  We (the girls and I) have not only got one but two birthdays to celebrate and I've been working on the second card today.

The person getting this card has her own orange 1970's Volkswagon Beetle and loves it - how could I not give her a card with such a fab image on it?  I searched the internet for possible images and played around with them on Picnik.

First of all there was this:
Which I thought would be THE ONE to give her, but then I played some more...
Wow! ..and some more:
..and then I changed the image:
like the rounded corners..
and this one is just great in this colour!

So now I have the dilema, which image shall I choose for the card?...  

Think it will be the top one because that is most like her car.  I've got some fab silver photo corners from Paperchase that will finish it off nicely.

See you tomorrow!

qwiksave x

Tuesday 16 March 2010

Hippy Birthday

I managed to stop my sort out of the attic space long enough to make a birthday card today:
It's for a friend who is in her 40's so I think she will appreciate the retro look of this.
Here are some close ups:
The buttons and the 'Happy Birthday' have been put on with stickydots
..and I made the background out of Tesco napkins - just £1 for a pack of 20.

I stuck a napkin onto card with a pva & water mix and then because I was impatient, dried it with my heat gun.  I added random splodges of inks and then inked the edges with a red ink pad.  After that I stuck another napkin down onto the background card with spray glue and cut around the edge to fit. Finally I added the buttons with matching ribbons and the stamped and Glossy Accented 'Happy Birthday' to the main image and stuck that down onto the card with some more spray glue.  As a final touch I distressed the whole card with scissors and inked the edges too.

What a feast of colour and texture! Hope my friend enjoys it as much as I do!

qwiksave x

(This was a modified post from yesterday)
Related Posts with Thumbnails