Welcome to my creative online journal

Showing posts with label wax art. Show all posts

Tuesday, 28 September 2010

Memory Card

No, not that kind of Memory!  This is a birthday card for my sister.  My original plan didn't work so I had to resort to 'Plan B' even though I hadn't got one! lol.

It's not finished yet, its a WIP but here it is:
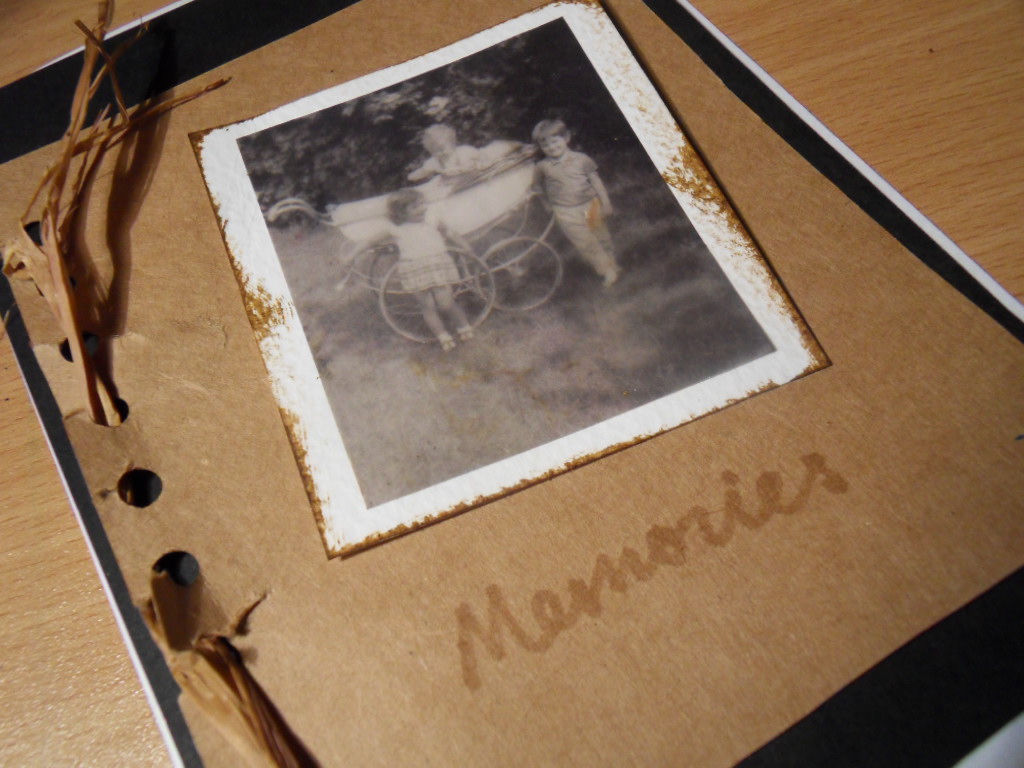
You can't tell from this picture, but the black & white photo (which is a photocopied version of the original) has had wax applied all over it. 

I had this brave idea to do this craft (applying wax to a napkin) and to make a card using it. 

But meanwhile,  isn't that a cute picture of one of my two brothers and sister with me?
(I'm the one in front with the frilly skirt!)  

I think I'm going to have to go with 'Plan C' now (ie make another card) because I've just remembered my sister doesn't like pictures of herself when she had really short hair (she is on the right) because people mistakingly thought she was a boy.   A shop Father Christmas even gave her a toy motorbike for a present that year!  :-O  Oops! As you can imagine, she tried to keep her hair very long after that! 
***
Going back to my original plan (thats Plan A remember), I did do the part where you melt the wax on the napkin, as you can see:
I had planned on making my card on a hippy/70's style theme (hence this choice of napkin) but it just didn't fit in with the photo I'd chosen. 

This picture shows the beeswax block first being melted:
It is melted on the plate of the hot iron (this is an old travel iron) and then the iron itself is swept across a glossy piece of cardstock several times.  The napkin (just one layer, separated first), is put down (face up) on top and more melted wax is added onto the top of it.  It gave the napkin and the photo the appearance of more depth.

As I say, its back to the drawing board on this one. The photo turned out not to be suitable (embarassing short hair) and nor was the napkin (wrong style).   This is going to be one of those crafts I'm going to leave for another (more co-ordinated) day.


Thanks for reading and for any comments,
See you tomorrow,
qwiksave

Tuesday, 23 March 2010

A Hat, 15 Eggs and a Bag

Today I have been finishing off previous crafts like my wax crayon eggs from yesterday and my abstract evening bag from the day before.

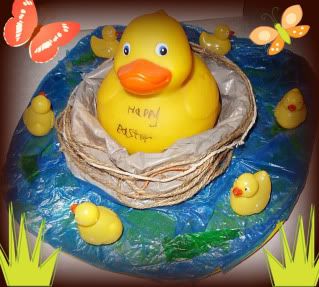
Before I show you how those are doing, I thought you might like to see the Easter Bonnet I made with my younger son last year:
It was made from a yellow plastic children's Fireman's helmet.  It has green and blue tissue paper on top of ripped up blue plastic shopping bags that were stuck around the rim with PVA for the water effect. I We used a brown plastic bag for the nest with string & twine glued on.  The little ducks are actually painted novelty ice cubes!  All of the ducks were stuck on with strong glue dots.  

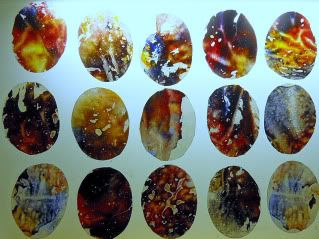
I didn't put the egg pictures I made yesterday in an art gallery (strangely enough), they were a bit brittle, but I did cut them out into egg shapes.  When we eventually get some sun, I'll stick  them onto a window:
(These were photographed on my light box)
 

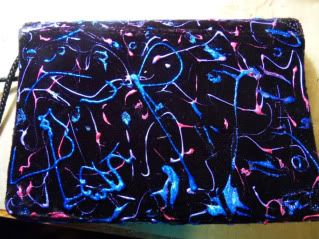
Again, the fabric paint on the bag is not dry (oops!) but it gives you some idea of the pattern I put on the back:
The blue has lots of glitter particles in it.  It really does look quite dramatic and I do fancy using it now (when its dry!) I could wear it with a plain black dress and maybe make some equally dramatic shoes to match...

See you tomorrow

qwiksave
x

Monday, 22 March 2010

Wax Art

Earlier on  this morning the sun was shining and it was positively Spring like. I found a project on this blog that I thought would be great to do to show off the sunshine.  The project was to make some egg shapes out of melted wax crayons and display them on your window in the sunshine.  This would have been good but by the time I'd finished the project the sun had gone away and it was pouring it down!

Here are the results of my egg making!  Truly glorious colour pictures that I haven't cut up into egg shapes yet as I'm thinking of displaying them in a modern art gallery instead! lol:


(To see individual pictures hover your mouse near the bottom of the screen, pause it and then press the forward button) 

A few tips I learned: 
Put the wax crayons in a dish of warm water to help soak off the labels, and don't use decent sharpeners (it wrecks them). You'll also need something sharp to unclog the sharpener regularly.  Expect sore fingers from all that sharpening and don't use that sort of Travel Iron, it doesn''t get hot enough!  You will need to use loads of  kitchen roll and an old teatowel  as it's very messy to do and I personally wouldn't get kids to do it.   Bet you can't wait, can you?....

qwiksave
x
Related Posts with Thumbnails