Welcome to my creative online journal

Monday 31 May 2010

Embossed Scroll Tiles

Ooh, it has been quiet not having my children around for a few days.  The bonus is not only do I get to watch my own TV programmes, but I also get a lie-in! Bliss!  I haven't been doing lots of crafting which I thought I'd be doing, I've been very uncharacteristically domesticated.  I've been throwing myself into doing a late Spring Clean.  I think its having the place to yourself makes you see things that you've been avoiding need doing more.

For my craft tonight I had a go at making some scroll tiles using my Cuttlebug embossing machine.
I used some wrapping paper for this (I would have used foil but I couldn't find it!)
I did an embossing (raised) one and a debossed (sunken) version but I prefer the embossed one.

The tile, which has my favourite design on it, scrolls, was from Ten Second Studio (I got it from a craft show) and was designed for embossing with hand tools.  Next time I do this, I will do it on foil and add colour to it with some alcohol inks.

See you tomorrow,
qwiksave
Sunday 30 May 2010

Exploratory Laminating

As my boys are away at their grandparents  for a few days I actually got to see my choice of programmes on the TV! What a treat! Today, I have had a few hours of watching the craft channel, 'Create & Craft', while I tackled my ironing mountain.

One of the programmes inspired me to make tonight's craft:.
A laminated inspirational postcard.

They were promoting a hot and cold laminator which looked quite useful, but I'm fine with just my hot laminator.  I was just looking for ideas to use it and they had quite a few.  One idea I loved was to add Tim Holtz's alcohol inks to the laminating paper, must try that some time. 

This idea, which I've tried, was to put embossing powder on your image before laminating it:
It kind of worked, but this red sparkly embossing powder went a bit pink.


Still, it's good to try new techniques and I am inspired to try other exploratory techniques with my laminator. 

Enjoy your Bank Holiday those of you in the UK,
See you tomorow,
qwiksave

Saturday 29 May 2010

Graffiti Bracelet

I've just finished watching the Eurovision Song Contest and oh dear! We came last!  I've had a fun evening though on MSE discussing the contest, having a laugh.  The German girl that won had a very strange voice, it seemed to be a mix of Cockney/Australian and American, most odd, and I must admit I was surprised she won.  I liked the Ireland song most but that didn't get many points either.

For my craft I had a go at making a bracelet out of that acrylic abstract painting I made a couple of days ago.
(Apologies for the strange coloured shadow)

I bought an elasticated wooden bracelet from a charity shop (for 50p!) that had eight wooden panels all the way around it.  I drew around each of  the panels onto my painting and cut them out.
I just used the red, yellow and black parts of the picture and stuck them onto the panels. I particularly focussed on the dry brushed bits.

Can't decide whether I should keep it or not.  If I do, I will need to varnish it  (Just wondering whether it might be a bit young for me?)

See you tomorrow,
qwiksave

Friday 28 May 2010

WOYWF

What's Out Your Window Friday?  Yeah, I know that's a bit naughty (taking a well known acronym), but the question I'm really asking today is 'what type of view can you see from your main room(s)? 

Today's project was mainly a photographic one as I have been taking pictures looking out from the large bay window in our front room.  It's quite surprising how different an everyday scene you see so often can look when you take the trouble to see it from various different angles or highlight a specific detail.  They can also look very different when you change them using photo manipulation software (such as the free one I use called Picnik).

(These pictures aren't really framed, the frames were created using Picnik)
(Click to enlarge)
We have a lot of old telephone wires going across our road which helps the picture look even more graphic.  (The sky was blue today, but not quite that blue!)
But digitally framing them like this does make me want to frame them for real.

***

I also did some crafting with my eldest son today.  We created some outer space characters to put on greetings cards using my Cuttlebug:
He loved turning the handle!
The pieces were so small though, we couldn't even breathe over them in case they blew away!
But here are our finished space pictures that are waiting to be stuck onto cards:
(With a touch of Picnik!)

Lots of people seem to be going away for the school holidays so blogsphere is going to be a bit quiet over the next week.  We as a family aren't going away, but my sons are going to their grandparents for a few days starting tomorrow (which may mean I'll be able to do more crafting! Yay!)

Have a great weekend or week if you are away,
See you tomorrow,
qwiksave

Thursday 27 May 2010

Glass Painting

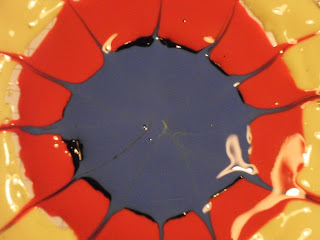
For this project I used lots of glass paint: 
I put the glass paint on acetate in rings and then used a toothpick to create the lines radiating out from the centre of the circle.
  
As you can see this has literally just been done so its all shiny and wet.  After it has dried off overnight I will be able to put it on a window or mirror.  If it looks OK when it dries I plan to make a few others in different colour combinations.

EDITED UPDATE: I haven't done any other colour ones yet and this is what this one  looks like on the window:
The yellow has glitter particles in it. I also added a pale blue to the centre. It has been moved around from mirrors to windows so it caused it to distort its shape a little:
.. and this picture makes it look like some kind of giant alien spaceship!
***
My children are off school tomorrow for Teacher Training, so I'm thinking of starting the holiday with doing something creative with them.

See you tomorrow,
qwiksave

Wednesday 26 May 2010

Inspired Painting!

I had fun tonight!  I haven't painted with acrylic paints in...oh, ever such a long time!  And tonight I didn't paint with acrylic paints at first...

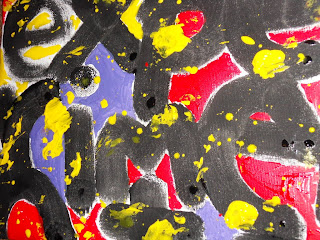
The black lettering isn't acrylic paint...

...it's black shoe polish!

As you can probably tell, I've been reading and trying some of the experimental painting suggested by Alisa Burke in the book I got in the post this morning (See yesterday's post).

At first, the scuff cover wouldn't come out and gave this lovely dry brush effect (on the 'e'):
and then after being shaken up it went nice and black and solid.

When I'd done the lettering, I loved the spaces the letters left behind so filled them in with red and purple.  ...And then came the yellow with reckless abandon!:
Sorry if this post isn't to everyone's taste but I have a feeling that I will be doing quite a bit more painting now that I've got the taste for it!  ;-)


See you tomorrow,
qwiksave

Tuesday 25 May 2010

Father's Day Memory Pennant

What I decided to do was a Father's Day Pennant in memory of my father.  You may remember I did a memory lamp for my mother for Mother's Day.

I found the idea for the pennant on the Maya Road Design Team blog and thought that would be a nice idea for something to display for Father's Day this year.  Don't panic by the way, its not until June 20th!

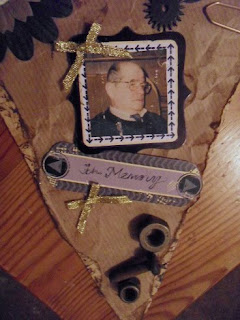
To make it I started off with a cork tablemat (charity shop find) which I cut into the triangular shape.  I found some brown wrapping paper in the recycling bin which was nicely crumpled already and I distressed it further with brown distress ink on the edges and on the creases and stuck it down onto the cork mat.  Then I made some holes for the gold chain that  I will hang it up with.  I put washers around the holes.  I then stuck down some buttons and made up the flowers with a button in the centre. 

 My father owned his own garage business so I thought it was fitting to add some found nuts, bolts and washers onto this pennant.  I added some diecut frames which I added the details and photos to and finished off with a few little embellishments and some handrawn lettering.

You could make one of these yourself for a Father's day present/decoration, it doesn't have to be an 'In Memory' one.
***
EDITED: In the daytime, artwork can look quite different to how it is at night.  When I looked at this work that I did last night I decided it was a little drab, so I've added some more white buttons - and I added a gear stamp to the background:

* * * * *
I'm also very excited because the postie brought the book I ordered:
Canvas Remix by Alisa Burke
Check out her fab blog here!


See you tomorrow,
qwiksave

Monday 24 May 2010

Recycled Project

The craft I made tonight  is from here. (including full instructions)

A box  made from just one recycled envelope!  Clever, eh?

I am interested in recycling and reusing and I rather like the idea of making use out of all those junk mail envelopes we accumulate.

OK, I shall confess, my box, made out of a VAT envelope is a bit more crumpled than theirs, want to see it?  Promise not to laugh?  Here you go then!

 
Obviously this is the reverse side, and this photo turned out reasonably in focus...

I shall just have to face it, origami is not my strong point! lol

*****

On another note, we had a strange bird in our garden today.  It had a red bit on its head and some yellow plumage (not shown on this pic)
Anybody any idea what it is?
I was quite excited, thinking it was something exotic and rare but I know nothing about birds and its probably something quite common.  If you know, please tell me in the comments. 

See you tomorrow,
qwiksave

Sunday 23 May 2010

Finished Birthday Card

I think the sun took it out of me yesterday and I was too tired to finish off the card I started last night so I did it today instead. 

I used PVA glue to stick down the cake designs on the napkins which gave quite a professional effect, almost like an image transfer, but I encountered a problem.  The napkins I used must have been such poor quality (£1.50 for 20 from Tesco) that they were very delicate and ripped in places when being stuck down.  I had to use pencil crayons to disguise the rips.

For the middle section, I didn't use acetate in the end, I just stamped onto the card.
I used glitter paper underneath and coloured the cake in with a Sakura glitter pen .

The card was finished off with some messy 'shabby chic' handrawn lines.

* * * * *

My younger son woke me up this morning with this, that he had written on my notepad:

Awww!

See you tomorrow,
qwiksave

Saturday 22 May 2010

Birthday Card in Progress

One of the problems of having such a glorious sunny day here in the UK is that I didn't get to read my massive blog list in the daytime today - I was too busy taking my little boys on their bikes to the park, (and quite rightly so).  They had a fabulous time splashing around in the paddling pool and playing with a frisbee.  I even managed to get them to come to a couple of Summer fetes with me, with the promise of the park & icecream afterwards! (I was after some crafty bargains, things to alter, but didn't have any luck).

But it meant that I have had to catch up with my blog list tonight, which has made me late for starting my craft. So I have an unfinished ('work in progress') birthday card (not stuck down) here to show you:

The cake squares are cut out from a Tesco napkin set.
The stamped images were stamped onto acetate:

There is a craft sale on at WHSmiths online and instore and I just HAD to have this Inkadinkadoo Birthday cake stamp set (that I used to make this craft).
It even came with some cute little embellishments.

I shall have to get my time management sorted out though, can't have sunny weather affecting my crafting!

See you tomorrow,
qwiksave

Friday 21 May 2010

Colourful Journal Page

A little while ago I had a 'practice run' (Link) at doing a journal page, well the idea still appeals to me to do a 'proper' one and now I have my Bind-It-All I can make my own pages.

So this is what I started to do tonight, my first background page:
The butterflies won't be on the page for real, they are just modelling for me! :-)    They are another recent purchase and they are magnetic.  I fancy using them as stencils as well as for other artistic uses.

To make this page (which I'm sure will be less dark when it dries) I used ordinary felt tips and a water brush.

And so that the colours kept individual, I wiped the water brush on my hand in between colours (a tip I learned from Create & Craft)
I love it when the colours spread out with the water.

Beautiful!

Another thing that is beautiful but not associated with it is the dandelion clock - there are so many around at the moment!

This is one of MANY in our back garden....

I meant our jungle! Where is that lawn mower? lol
Have a Great Weekend,
See you tomorrow,
qwiksave

Thursday 20 May 2010

Gold Key Fobs

Hands up who recognises this?:
Maybe a few of the older ones amongst you (tee hee). 
This is what I have used to create my craft tonight:
It is, of course, a very dusty,old typewriter.
(And yes, it was one of my charity shop finds a while back, with the intention of doing something crafty with it!)

I was inspired to do this craft when I was looking through my massive blog list today and spotted this craft for a Father's Day present.
I decided to make my own labels using gold card:
Trouble was, this typewriter didn't like the thickness of the card much so kept slipping:
But I think it adds to the charm!
I used a template of tags which I drew around onto the card with a blunt point (the tip of my computer mouse pen!) and cut around each tag leaving a small border.  I punched a hole in the tags and used a book ring to attach them to a massive brass key:
I need to back them with some thicker card to finish them off but I am generally quite happy with how they have turned out.

See you tomorrow,
qwiksave

Wednesday 19 May 2010

Altered Dominoes

It feels nice to have got over little one's party - its something that you make lots of preparations for (stressing yourself out in the process) and then get relieved when its finally over.  To me it feels like a weight has been lifted off my shoulders, until the next one that is, and for me that will be January next year. 

So, its back to 'proper crafting' and today I decided to have a go at altering some dominoes:

It's not something I've done before so I looked up how to do it on the internet and I found this excellent tutorial which I followed a bit. 

I'd managed to get some cheap dominoes from a charity shop for £1:
and found the only two colours of alcoholic inks that I have, denim and terracotta. 

Great colours! I put a few drops on the felt applicator and dabbed them onto the domino.  They react against each other, its fun to watch:
I made four (see above picture)
and then decided that I would colour the edges with Gold Rub 'n Buff:

I also added some gold to the front of the domino too:
Lovely effect!

I didn't stamp over mine because I didn't want to cover up the pattern but I will assess them in the morning and see if they need anything 'extra.'

See you tomorrow,
qwiksave


Related Posts with Thumbnails