Welcome to my creative online journal

Showing posts with label birthday card. Show all posts

Thursday, 17 March 2011

Oriental Themed Necklace

I stayed up really late finishing the second of the 'stamped cup of tea tree' cards for my friend's birthday celebration today.  I will show you that in a bit but I thought I'd show you what I also made for my friend [this morning before I saw her at lunchtime! :-O ]

This Tim Holtz Fragment necklace:
The script is a rubber stamp of some (ancient?) oriental lettering, which was part of a Crafty Individuals stamp set I got when I subscribed to 'Craft Stamper' magazine. 
I stamped it with Black Stazon onto red mirror board and when dry glued a Tim Holtz Fragment on top of it with Glossy Accents.  After that was dry I cut around the outline of the shape and added the chain.  

This was the other card I made using my fab new tree stamp:
The card opens where the flowered paper is scalloped.
I coloured the all white flower ribbon with a brown Sharpie to match the flowers on the patterned paper.. 
...and coloured a pale yellow flower embellishment with a blue promarker. 

Its a handy money saving tip that, rather than buying your embellishments in lots of different colours, colour them yourself with your existing stock of pens, paints and alcohol inks.

Thanks for looking and for any comments,
qwiksave

Wednesday, 16 March 2011

Quirky Distressed Birthday Card

I got a fab new stamp yesterday and couldn't wait to use it on a couple of birthday cards I need to make (for tomorrow, eek!).  I thought I'd do them in two different styles, one with an old fashioned, distressed  look and the other one using more up to date, modern papers.  That was the plan and so far I have just done the distressed card:

The background stamps were deliberately done in an incomplete distressed style.

This is the main image though, it is such a fun stamp, very quirky:
Sentiment says 'Meet under the tree for a nice cup of tea'

The stamp is a Crafty Individuals stamp from Aldridge Crafts.
The fake stitching is a rub on, the papers (distressed with sandpaper) were freebies from card magazines and the image and the Happy Birthday sentiment were attached with 3d dots.  The placement design was from an old CPS sketch.  

I would like to enter it into the following challenges:
LITTLE RED WAGON - St Patty's Day - Green 

Good news for me yesterday! I won a couple of tickets to the Hobbycraft show at the NEC in a couple of weeks.  Yay!

Thanks for looking and for any comments,
qwiksave

Tuesday, 11 January 2011

Happy 11th Birthday

...today to my eldest son, Ryan.  His age will always be easy to remember as he was born in the year 2000.

I made him an old fashioned card as he loves steam trains:
...using a Create-a -Scene stamp set which I got from a charity shop for 50p!

I had to mount it on Kling-On backing first:
..and the photo corners I had were black so I coloured them gold using
...Inka Gold by Viva
..a moulding type paste you apply with a sponge. Rich!

I drew a gold line frame around the image using my Promarker Gold pen and used my Versafine Sepia inkpad to stamp the scene onto a brown paper bag. 

*****

And here he was this morning, before school, opening his pressies:

I got him a few jokey pressies like the long haired wig (centre) because he told me he doesn't want his hair cut anymore, he wants to grow it long! lol.  I also gave him the jokey cockerel nose.

He is very into Lego
..so I was pleased to get this Lego wrapping paper from M&S.  He was so delighted with it he tried his best not to rip it when opening up his pressies.

(Fun coloured flamed candles)
HAPPY BIRTHDAY RYAN

Thanks for looking and for any comments,
qwiksave

Tuesday, 28 September 2010

Memory Card

No, not that kind of Memory!  This is a birthday card for my sister.  My original plan didn't work so I had to resort to 'Plan B' even though I hadn't got one! lol.

It's not finished yet, its a WIP but here it is:
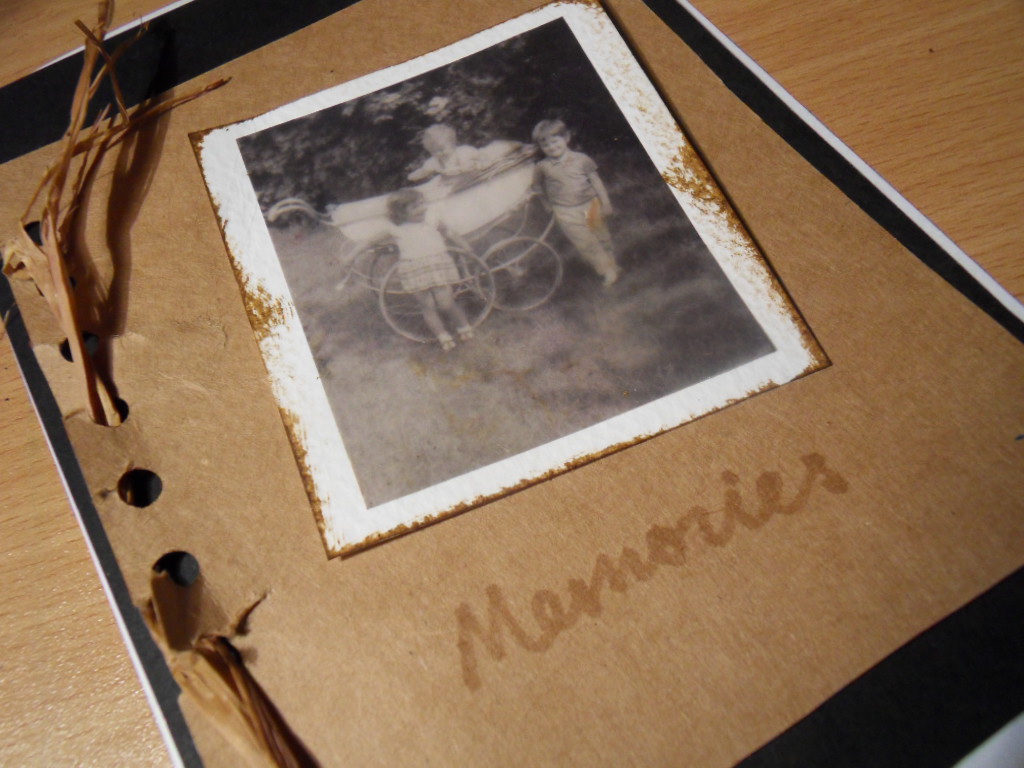
You can't tell from this picture, but the black & white photo (which is a photocopied version of the original) has had wax applied all over it. 

I had this brave idea to do this craft (applying wax to a napkin) and to make a card using it. 

But meanwhile,  isn't that a cute picture of one of my two brothers and sister with me?
(I'm the one in front with the frilly skirt!)  

I think I'm going to have to go with 'Plan C' now (ie make another card) because I've just remembered my sister doesn't like pictures of herself when she had really short hair (she is on the right) because people mistakingly thought she was a boy.   A shop Father Christmas even gave her a toy motorbike for a present that year!  :-O  Oops! As you can imagine, she tried to keep her hair very long after that! 
***
Going back to my original plan (thats Plan A remember), I did do the part where you melt the wax on the napkin, as you can see:
I had planned on making my card on a hippy/70's style theme (hence this choice of napkin) but it just didn't fit in with the photo I'd chosen. 

This picture shows the beeswax block first being melted:
It is melted on the plate of the hot iron (this is an old travel iron) and then the iron itself is swept across a glossy piece of cardstock several times.  The napkin (just one layer, separated first), is put down (face up) on top and more melted wax is added onto the top of it.  It gave the napkin and the photo the appearance of more depth.

As I say, its back to the drawing board on this one. The photo turned out not to be suitable (embarassing short hair) and nor was the napkin (wrong style).   This is going to be one of those crafts I'm going to leave for another (more co-ordinated) day.


Thanks for reading and for any comments,
See you tomorrow,
qwiksave

Thursday, 15 July 2010

Sensational 70's

I was a teenager in the 1970's and I still have a great fondness for the era, maybe you have for the decade that you were in your teens?

As you may know, I'm still at the planning stage (take that to mean procrastinating) for scrapbooking my life for my children and I'm relishing the idea of scrapping the 1970's.

I have a bit of a collection and even bought a few dolls clothes today from a charity shop.  They are, ahem, awful! Just look at those patterns! They were handmade clothes that someone must have made for their little girl or grandchild:

(Plus a few other bits and bobs - this is just a very small selection of my collection). Also did you spot those 'lovely' pink knickers! lol:
Made for a bigger doll than the others.

I also still have some vinyl records of hits from the 1970's - our record player worked up until very recently.
These are the records in their 70's themed sleeves:
Yep, I'm going to enjoy documenting this very interesting, but seemingly tasteless (when looked back on), era of my youth.

I also made a 'Thank You' card for one of my son's teachers tonight:
Not sure I like it, too 'pretty' for my taste, but it suits its purpose..

Thanks for stopping by,
See you tomorrow,
qwiksave

Sunday, 23 May 2010

Finished Birthday Card

I think the sun took it out of me yesterday and I was too tired to finish off the card I started last night so I did it today instead. 

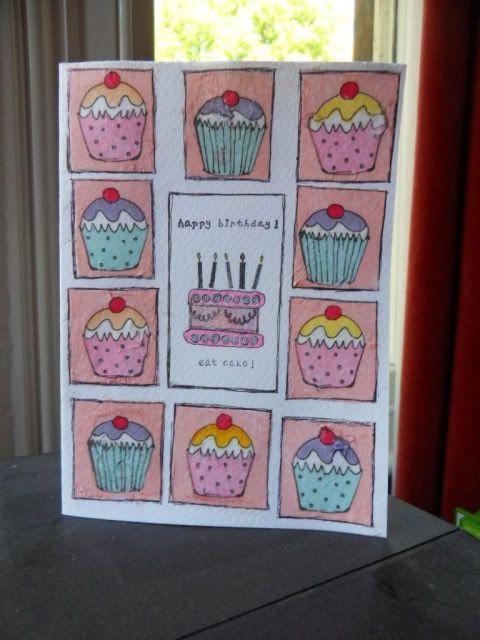
I used PVA glue to stick down the cake designs on the napkins which gave quite a professional effect, almost like an image transfer, but I encountered a problem.  The napkins I used must have been such poor quality (£1.50 for 20 from Tesco) that they were very delicate and ripped in places when being stuck down.  I had to use pencil crayons to disguise the rips.

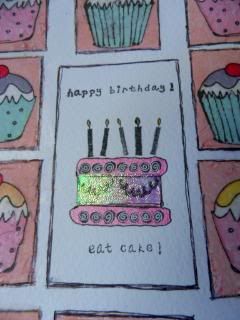
For the middle section, I didn't use acetate in the end, I just stamped onto the card.
I used glitter paper underneath and coloured the cake in with a Sakura glitter pen .

The card was finished off with some messy 'shabby chic' handrawn lines.

* * * * *

My younger son woke me up this morning with this, that he had written on my notepad:

Awww!

See you tomorrow,
qwiksave

Saturday, 22 May 2010

Birthday Card in Progress

One of the problems of having such a glorious sunny day here in the UK is that I didn't get to read my massive blog list in the daytime today - I was too busy taking my little boys on their bikes to the park, (and quite rightly so).  They had a fabulous time splashing around in the paddling pool and playing with a frisbee.  I even managed to get them to come to a couple of Summer fetes with me, with the promise of the park & icecream afterwards! (I was after some crafty bargains, things to alter, but didn't have any luck).

But it meant that I have had to catch up with my blog list tonight, which has made me late for starting my craft. So I have an unfinished ('work in progress') birthday card (not stuck down) here to show you:

The cake squares are cut out from a Tesco napkin set.
The stamped images were stamped onto acetate:

There is a craft sale on at WHSmiths online and instore and I just HAD to have this Inkadinkadoo Birthday cake stamp set (that I used to make this craft).
It even came with some cute little embellishments.

I shall have to get my time management sorted out though, can't have sunny weather affecting my crafting!

See you tomorrow,
qwiksave

Saturday, 15 May 2010

Pizza Party

Phew! That pizza party was just as I thought, mischief and mayhem - but my son still thought 'it was the best party ever!' 

I've made him a quick digital card tonight (for his birthday tomorrow!) using a photo of him and his friends on the walk to Pizza Express:


They were all so excited, running off as quickly as they could and not always in the same direction.  Me & my husband had to 'disown them' ocassionally. 

But they all enjoyed making their own pizzas - this is the one the birthday boy made:

Can you  spot the smiley face? :-)

Memories are made of moments like this:
You could (almost) forget the St Trinian's style dough and flour flinging that went on!  lol

See you tomorrow,
qwiksave

Friday, 16 April 2010

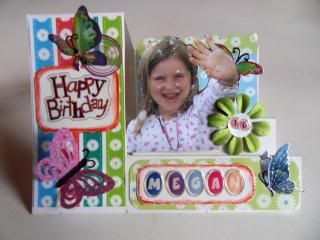
Girl's 10th Birthday Card

Stop right there! - but only if you're one of my bestest mates and have a daughter named Megan whos 10th birthday is coming up soon, because I am showcasing the card I have made for her.  Well, OK, you can look if you want, but sssh, don't show Megan....  The rest of you feel free to carry on!....  :-)

Here is the card in its present state:
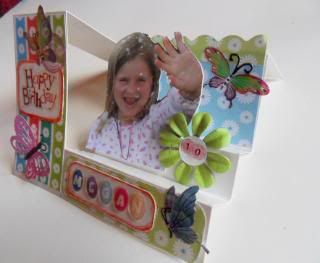
It's a pop-up card and it took me HOURS to make!  Behind this innocent fascade there are loads of complicated cuts and folds.  You can see more in this side view:
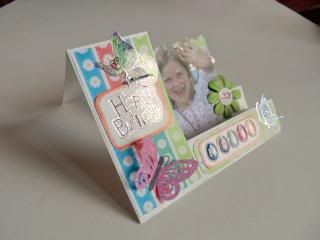
It wasn't my own invention, I got the idea from this fab italian blog called Hobby di Carta (that I always use Google to automatically translate for me) and even though the step by step instructions were pretty good,  it was still a very tricky card to make.  In fact, I can honestly say that this has been the most difficult card (technically) that I've ever made. But even though it was hard, it was fun too and getting myself through that challenge meant that I got to do the bit I like, personalising the card afterwards.
 
(Sorry about the quality of this pic, its a bit too reflective)

To decorate it I used loads of free papers from cardmaking magazines, the daisy designs were from 'Simply Cards & Papercraft'.  The stickers were from my stash and I made use of two recently purchased punches, the dimensional butterfly and the scalloped edge, both from x-cut/docrafts. 

(This photo of Megan isn't the picture I will be putting in the finished card, I'm going to get a more recent one, and one without bubble mixture on her hair and face!)

To finish today's post, I'm just letting you know that I'm going away.  No, not to this fantastic place, (Wow! Read the whole post! - and be a follower too, this lady is SO creative!) I'm just going to visit my sister in Milton Keynes for a couple of days.  So have a great weekend, and I'll see you back here soon....

qwiksave
x

Wednesday, 17 March 2010

Orange VW

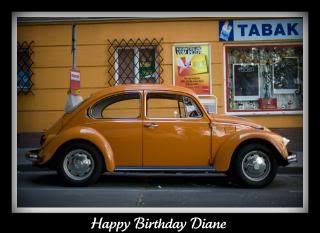
I'm finally allowed out! Not just out of the attic space which is going to take weeks to sort (!), but out on the town on Friday night.  We (the girls and I) have not only got one but two birthdays to celebrate and I've been working on the second card today.

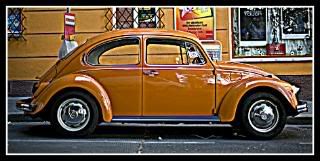
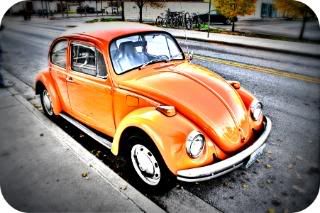
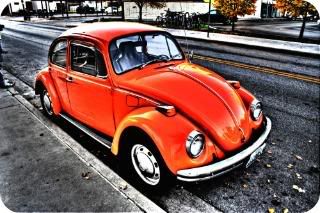
The person getting this card has her own orange 1970's Volkswagon Beetle and loves it - how could I not give her a card with such a fab image on it?  I searched the internet for possible images and played around with them on Picnik.

First of all there was this:
Which I thought would be THE ONE to give her, but then I played some more...
Wow! ..and some more:
..and then I changed the image:
like the rounded corners..
and this one is just great in this colour!

So now I have the dilema, which image shall I choose for the card?...  

Think it will be the top one because that is most like her car.  I've got some fab silver photo corners from Paperchase that will finish it off nicely.

See you tomorrow!

qwiksave x

Tuesday, 16 March 2010

Hippy Birthday

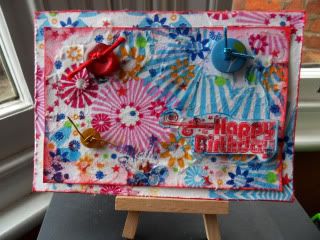
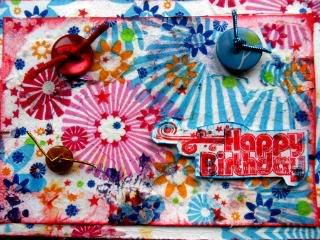
I managed to stop my sort out of the attic space long enough to make a birthday card today:
It's for a friend who is in her 40's so I think she will appreciate the retro look of this.
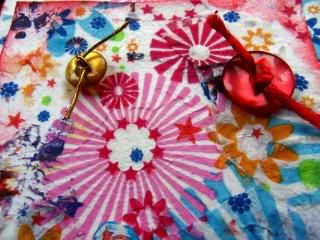
Here are some close ups:
The buttons and the 'Happy Birthday' have been put on with stickydots
..and I made the background out of Tesco napkins - just £1 for a pack of 20.

I stuck a napkin onto card with a pva & water mix and then because I was impatient, dried it with my heat gun.  I added random splodges of inks and then inked the edges with a red ink pad.  After that I stuck another napkin down onto the background card with spray glue and cut around the edge to fit. Finally I added the buttons with matching ribbons and the stamped and Glossy Accented 'Happy Birthday' to the main image and stuck that down onto the card with some more spray glue.  As a final touch I distressed the whole card with scissors and inked the edges too.

What a feast of colour and texture! Hope my friend enjoys it as much as I do!

qwiksave x

(This was a modified post from yesterday)

Saturday, 6 March 2010

Nostalgic cassettes

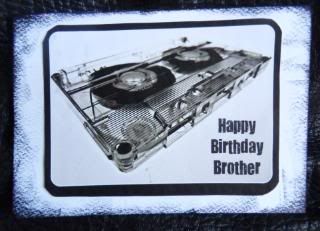
Tonight I have been making a birthday card for my younger brother, who's birthday is on Tuesday - yikes! Why do I always leave them until the last minute?  I'm too trusting of the Post Office, which is not necessarily a good idea.

Anyway, to get onto the card. Here it is:


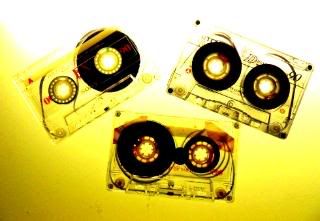
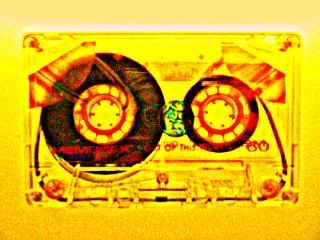
When we were growing up, in the, ahem, 1960's/70's, we used to record music from our record players and the radio (especially the Top 40) onto cassette tapes. My music taste tended to be into the latest pop like Abba, The Osmonds or the Sweet and my brother was into 'hard' rock music like Motorhead and AC/DC.  Anyway, I used to have such nice writing, that he paid me to write on the inlay cards (the packaging around the tapes) on all of his cassette cards - and he had hundreds!  So we have this in common, and I still have some tapes (loads in fact) in my attic so I dug them out to make this card.

I put the cassettes onto my light box (handmade by my husband!) and photographed them and then played with the images using Picnik:


(I got the original idea from a similar card I have seen in Paperchase)

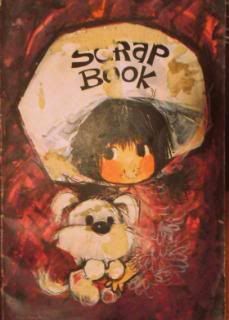
While I was up in the attic, I also found this old 1970's scrapbook that my sister was going to chuck out.  It has lots of songwords to songs from the 1970's, I love it!:

I also love doing nostalgic projects! :-)

qwiksave
x
  
Related Posts with Thumbnails