Welcome to my creative online journal

Showing posts with label scrapbooking. Show all posts

Friday, 8 April 2011

This Old House... Scrapbook Page

This is my entry to the Gauche Alchemy Julie Fei-Fan Balzer painted page challenge which is due for today (eek!):

It's a page about the house I grew up in (the address is on the tag but I have blurred that for privacy)

This is the journalling:

...and the finished page:
The dark blue background to the photo is a piece of canvas cloth that I coloured with a Memento ink pad (as seen on QVC today!) All the letters were painted blue.  They were from 3 different styles of chipboard lettering sets.  The letters for OLD were distressed, I attempted to crackle them but that didn't work out.  I've added vintage buttons using Glossy Accents and everything else was stuck down using PVA or Multi-Medium.   The reason for the blue colour was because for many years the paintwork on the house was blue so that is how I remember it.

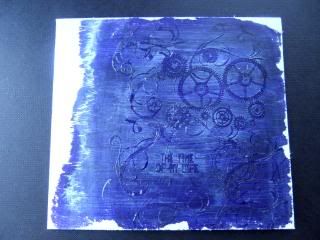
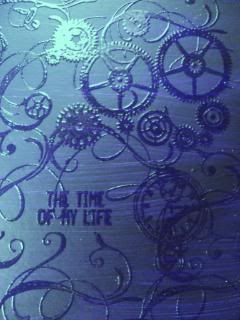
 I showed you how I made the painted background on this slideshow post here a few days ago.  For the layout of this one, I used a sketch  from the 'Pencil Lines' book that I (woohoo!) got for Christmas. I'm just off to link this layout with Gauche Alchemy now and then its off to bed with me, its the middle of the night! 

Hope you've had a good week, thanks for looking and for any comments,
qwiksave

Tuesday, 29 March 2011

Scrapbooked School Photo

Those of you that have been with me a while may remember this post where I said I was going to make scrapbooking photo pages of lots of my relatives to put on display around the house.  This idea came back to me last night so I came up with this:
(My boys count as relatives too!)  
I know, I will do other relatives but I do want pictures of my two little scamps in amongst them.

Speaking of scamps, the reason I did the photo like this with the inkblots and the untidy distressed look is because, like in the way most school photos are taken, my boys look as though 'butter wouldn't melt!'  Well we all know the truth don't we! lol.

For the background I used the title page of a block of an old range of Basic Grey paper:
And originally my letters were purple:
 ..so I coloured them with a black Sharpie.
 I typed the titles with an old typewriter but the ink was so faded that I went over the lines with a fine black pen.  Then I used a school range of rubons for the other random lettering.  As this is to be behind glass I couldn't use thick embellishments.  The inkblots came from a stamp.
(The background used here is an old 1960's school desk complete with a hole for an inkwell)
 
And finally the picture framed:

Enjoy your week, thanks for stopping by and for any comments,
qwiksave

Friday, 17 September 2010

Gift of Dreams

I'm feeling a bit sorry for myself today, I've been to the dentist and had my very first extraction! Owwww! Certainly makes me want to take a lot more care of all my others! :-(   I liked what the dentist prescribed though, 'you need to lie on the sofa and have flowers and chocolates!' lol.  This was directed at my husband who was there with me - shame it didn't happen though! (bah!)

Tonight's craft:
...is this scrapbooking page of Christmas 1999 - Love the lettering on this Bo Bunny Paper (free with one of the papercrafting magazines this month), that says this:
'You are the Gift that made all my Dreams come true"
I've always loved this picture of myself when heavily pregnant, taken the month before my eldest was born:
I did ask my husband to deliberately chop my head off when he took the picture - it made it more photojournalistic!
I just thought it suited the sentiment on the Christmas themed paper perfectly.
* * * * *
My two boys have had their first lesson in Fencing after school (in school) today, hope they don't start practicing - on me!

Have a great weekend.
Thanks for looking and for any comments you may leave,
See you tomorrow,
qwiksave

Tuesday, 22 June 2010

90th Birthday Scrapbook Finished!

Phew!  I spent a couple of hours in the very early morning (the midnight bit) and ALL DAY today creating this special birthday scrapbook I started yesterday for my sons' great grandmother.  But I am pleased to say, I did it and it was well received too.

I've got loads of photos of it so hope you don't mind me showing you.  It's not like me to do this much crafting in one day, I almost had craft overload! 

You saw the cover yesterday, but here it is again, when its all finished:

I was wrong saying that bottom RH button is not very big, it IS big!  (This, incidently,  is a non-journalling type of album, just a 'simple' type made as a gift)

Here is one of those swing round pics.  I've never done one of these but see them on other people's blogs and always fancied doing one - Ta Da!:
The first couple of pages were of these images of my boys.  Yes, I know you've seen these particular pictures LOTS of times on this blog, but they are nice and clear for a scrapbook for someone 90 years young! :-)
I put script background paper on the chipboard shapes first and you may recognise those labels from a free download mentioned on a previous recent post.  The addition of old buttons completed the look.
For the next page (above), I covered the background with flourished patterned paper and then used stencils with a black pen for the inner shape and additional flourishes.  More buttons and a ribbon completed the effect.
This page I used the same stencil with a white pen and drew this new frame with rough lines.  I added flowers and buttons for the centres.
The next two pages. I used a boy themed script paper for the background and drew around the frame with a brown pen.  The one on the right has boy themed rub-on transfers of stones and insects.  I also added some Glossy Accents to them to make them 3d-ish.
Ahh, my mud pages! Rub-ons were added to paper and added to the page.  On the right, I used a freebie paper (in the collection with the owls) and shiny silver buttons in all the corners.
Same paper, different orientation. Addition of stickers and the Cuttlebug robots Ryan and I made recently.  I was going to put a red button or three on the LH page but ran out of time!  
Back page. I'd got the boys to write this out and stuck it onto some patterned paper. For that awww factor.

We went to a barbeque to celebrate her birthday, and here is the birthday girl herself  blowing out her candles:
Happy 90th Birthday Grandnan Swain!

See you tomorrow,
qwiksave

Monday, 21 June 2010

Mini Scrapbook

After my unsuccessful attempt to make a scarf for my sons' great 'Grandnan' as they call her, I have decided to do her a mini scrapbook of her 'great grand boyz'. 

Here's the cover and I'll show you more as it progresses:
This angle makes the button bottom right look enormous, but its not in RL.

Don't the boys look as if butter wouldn't melt? lol.  This picture was taken at their Uncle's wedding in the Philippines two Christmasses ago - we were there for 3 weeks in baking hot sunshine during December.

I used a Papermania chipboard scrapbook as my base and have just stuck on bits of my stash.  The owl paper was a freebie from a recent cardmaking magazine. 
Not all the pictures will have them looking as angelic as this (actually no other pictures will they look like that! :-) , I've got some where they are all covered in mud and that will be going in soon....  (Must get on, I need to finish it for tomorrow! :-O !!)

Thanks for stopping by,
qwiksave

Friday, 7 May 2010

Scrapbooking Page!

You'll have to excuse me but I haven't finished tonight's craft - I ended up watching the News to find out what actually happened in the Election yesterday.  It's still all a mass of confusion by the looks of it. 

Then I decided to do a scrapbooking page.  Trouble is, I should have given it a  bit more preparation than I had time for.  I was scrounging around trying to find some red patterned paper for the background.

Anyway, here it is in its unfinished, not glued down stage:

(Going to change the ryan title somehow and thinking of mounting the photo on black paper not blue)
It's 8x8 size, I bought 2 (black suede) albums in the WH Smith's sale the other day only £5.99 each! I'm planning to do one of each of my boys.

This picture was taken outside a restaurant in Bournemouth - some of you may recognise it - its a surf board mounted on the outside wall that tourists take pics of themselves 'surfing' on.

Enjoy your weekend, whatever the weather,
See you tomorrow,
qwiksave

Tuesday, 27 April 2010

This is My Life

One of the projects I've mentioned I plan to have a go at is to write and scrapbook my life story for my own children and for future generations.  I am reading a good book on how to go about this that I got from my local library, the book is called "Your Life Your Story" by Cherry Gilchrist and I would recommend it if you are thinking of doing the same:
(Available at Amazon  ISBN:978-0-7499-4270-0)

I am working through the book and one of her suggestions that I like the idea of was to use a ringbinder that you can separate (using subject dividers) into different ages of your life. This will help because you can write about areas of your life as you remember them but they will be separated into their own 'compartments'. You will be building your story separately but still be working towards completing the whole thing. (Hope thats clear!?)

Anyway, the point is, I wanted a ringbinder that I will enjoy using (it needed a certain 'look') and I came up with this:

It was a plain red ringbinder that I have modified to make it look like 'one of those books' from the TV series of the same name (older readers will know the one I mean!)
I put flock letter stickers (very touchy feely!) onto some gold card:
and added Paperchase photocorners around the edge.  I also embossed the line around the frame using a blunt point and a ruler....

..and glued gold card triangles onto two of the corners:
I think I'm going to enjoy writing in my 'luxury book' - and also think it would make a great gift to make for someone else (fully completed if possible!)

See you tomorrow,
qwiksave

Wednesday, 7 April 2010

To Scrapbook...or not?

I got myself the new Scrapbook Inspirations Ideas Book/Magazine yesterday (using my 10% off voucher from WHSmiths) and I've been looking online at loads of scrapbooking sites and blogs and it has really inspired me to seriously have a go at documenting my life for my children.  I am, (ahem), no longer a Spring Chicken and I really would like my two boys to know what life was like for me when I was a child and  to let them know about the life I have led. 

I also want them to know about my parents, of whom they never really knew as both of them are sadly no longer with us.  I have told my boys elements of all kinds of things, (because they think I lived at the time of the dinosaurs!) but it would be so much better to have it all documented for them.  It is something I would have loved to have of my parents - what life was like in the wartime and the 1940's and 1950's for them.

I am only at the stage of sorting through loads of boxes and piles of photos, writings and assorted paraphernalia so all I can show you today are bits and pieces of things I have found whilst sorting:


I am also a bit nervous about starting the actual pages. I have seen very minimal pages which I like, but I also like the 'really busy' embellishment filled pages too!  And journalling - you want to tell the story but could  it crowd the page too much?  Also, what type of paper do I use? I am working towards getting Retro pages (in fact I've ordered some of the new Tim Holtz -Woo!)  for my history, but I also rather like the idea of painting my own.  Embellishments too. I consider myself to be something of an artist so almost begrudge the idea of paying for someone else's 'stuff' - but then again, printed stuff looks so much more professional.... (and lets face it there's some great stuff out there!) 

Sorry to ramble, it just helps me to get it down on paper screen!  I really need to stop procrastinating and just get on with it!

qwiksave
x

Sunday, 17 January 2010

Starstruck scrapbooking page

First of all, I think I should show you the card that Ryan made using the fingerprint idea we were doing yesterday:


Older children should do their own thank you cards really, however tempting it is for us crafty mums to take over! lol  (Don't mention the one I did a few days ago!)

Moving swiftly on....

Today I made a mini-scrapbook page for framing.  I picked up a cheap square frame in a charity shop that said it was for putting a 7" single record (remember them??) on display.  I tried putting a single in ('Two Little Boys' - and I was going to put pictures round the side of my 'two little boys' but the frame was too small!)  so I thought I'd  make a display scrapbooking page instead.  I've never done a display one before but that didn't stop me! 

As my boy Ryan was going to bed tonight he looked out the window and called to me to take a photo of the 'Orion' star constellation which was really clear in the sky tonight.  This is what gave me the idea to make this page about him, Ryan that is, being 10.  He loves science, astronomy and making homemade potions in test tubes so I had a good theme to work on. 

It was simply a matter of finding a nice photo of him, rummaging through the bits and bobs of my crafting stash and a good children's science book (Usborne's) and the page was made!:


If only all scrapbooking pages were this easy!...

PS.  Oh yeah, I also did this too in Picnik! :-)

Think I'll print it out and put sparkly gems on it, maybe make it into an avatar...?

Friday, 15 January 2010

Distressed Scrapbooking

Today's project isn't a finished project, it is a new technique that I learnt whilst blog-hopping today.  This technique which combines stamping with distressing card, came from an amazing scrapbooking blog I came across today from someone who has only been doing scrapbooking for 2 years.  Her work is incredibly creative and this is the kind of scrapbooking I would like to do one day.

This is the blog - with a video tutorial of how to do the technique (scroll down) and this is the example I made using the technique:


Basically what you do is paint onto the card (or chipboard) with a dark coloured acrylic paint and wait for it to dry.  When it is dry you stamp onto it with embossing ink and sprinkle over it with clear embossing powder, clear off the excess and heat set it.  Then you paint over it all with a light coloured acrylic paint.  After a few seconds, you wipe it over in circular motions with a baby wipe or damp cloth, which reveals the stamped image.  I love distressing effects so I'm pleased to find another one to use. I also distressed the edges of mine too.

It could be used on a card or a scrapbooking page or simply framed as it is and put on the wall or mantlepiece.  It would also look great as a background.

Thanks again to Yatie Tajudin of Malaysia, the fab blogger of 'A Scrapping we will go' (See link in My Blog List, bottom right)

Tuesday, 5 January 2010

Thanks for the xmas gifts

This card was inspired by scrapbooking pages, and also resembles a wrapped present. The large snowflake in the top corner is glittered and also has tiny red flatbacked gems on it. The red and white stripes are ribbons and the 'thanks' wording is a 'Cuttlebug' die cut.


This card is going to my sons' aunt & uncle in Ireland to thank them for the Lego that they got the boys for Christmas. I'll be getting each of the boys to write their own message inside!
Related Posts with Thumbnails