Welcome to my creative online journal

Showing posts with label distressing. Show all posts

Wednesday, 16 March 2011

Quirky Distressed Birthday Card

I got a fab new stamp yesterday and couldn't wait to use it on a couple of birthday cards I need to make (for tomorrow, eek!).  I thought I'd do them in two different styles, one with an old fashioned, distressed  look and the other one using more up to date, modern papers.  That was the plan and so far I have just done the distressed card:

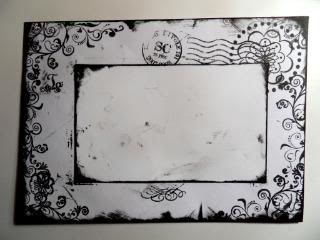
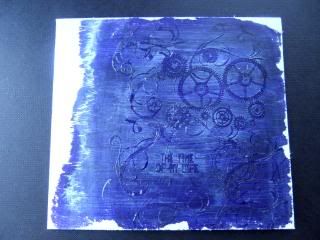
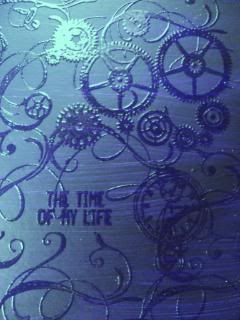
The background stamps were deliberately done in an incomplete distressed style.

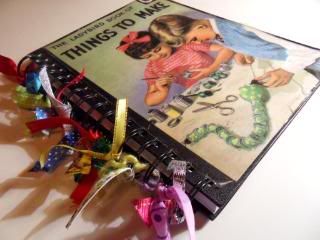
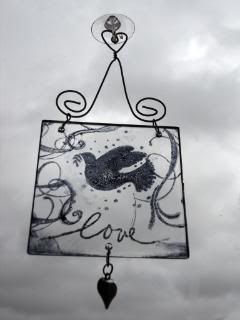
This is the main image though, it is such a fun stamp, very quirky:
Sentiment says 'Meet under the tree for a nice cup of tea'

The stamp is a Crafty Individuals stamp from Aldridge Crafts.
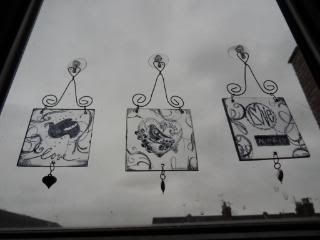
The fake stitching is a rub on, the papers (distressed with sandpaper) were freebies from card magazines and the image and the Happy Birthday sentiment were attached with 3d dots.  The placement design was from an old CPS sketch.  

I would like to enter it into the following challenges:
LITTLE RED WAGON - St Patty's Day - Green 

Good news for me yesterday! I won a couple of tickets to the Hobbycraft show at the NEC in a couple of weeks.  Yay!

Thanks for looking and for any comments,
qwiksave

Friday, 10 December 2010

Christmas Tags using stamps

No, not that kind of stamp - mailing stamps! :-)  - the kind you put on envelopes.

Old ones to be precise:
(From back in the day when the Post Office gave a decent service! Grrr!)

I had a template for the tag which I drew around onto some script scrapbooking paper (Bo Bunny)

I cut it out, then added the stamps (available from charity shops).  These didn't have those wavy lines on so I stamped those on separately.
Then I distressed the edge, punched a hole and added a twine ribbon.

I'm not going to put any christmassy words on the bottom (a la Tim et all) because I am going to use these as real tags for pressies.

Thanks for looking and for any comments,
See you tomorrow,
qwiksave


Friday, 5 November 2010

Mini Tim Holtz Booklet

I've made a mini book with pockets using Tim Holtz papers tonight.  It was not my idea, I got a fab video tutorial from Creations by Christie .

It's very easy and made with just one sheet of 12x12 paper!  Some clever folding, a bit of glue and a titchy bit of cutting.  Please see the step by step instructions on the video on Christie's blog.

This is the front of the booklet.  I've used a large button and some twine to tie it together. 

The page was from the Retro pad and I distressed all the edges with sandpaper.  Think Tim would approve! ;-)

This picture shows how you can put photos in the pockets.  The boy in these photos is now in his 30's and 'just happens' to be the son of the lady who is 60 this weekend.  This will be another 'extra' little pressie for her.

* * * * *
I have an apology to make about my post earlier with the fireworks.  You may not have seen it, but you may have heard it! {{Blush}}   It (a slide show with pictures of my makes and some fireworks), was so noisy that it even played in Google Reader when you weren't even looking at this blog!  I didn't realise it would do that, big Ooops!  (Luckily it's safely deleted now).

Thanks for looking and for any comments,
My husband has just walked in the door from working in Germany, best go,
See you tomorrow,
qwiksave

Thursday, 21 October 2010

Paper Flower Tutorial

During the year that I have been posting on this blog, I have seen many handmade flowers out there in Blogland and have never attempted my own, until now! 

I picked up a copy of 'Crafts Beautiful' whilst out shopping today (I'm a sucker for all the cardmaking and scrapbooking magazines, especially Christmas editions), and they had an excellent tutorial on how to make some flowers so I had my first go.

This is how it mine turned out:
Using an old dictionary, a scallop circle punch, a pokey tool and a button

To make it I did the following:

Cut 5 circles out with the punch:
(I forgot to check what was on them!)

Then make a hole through each centre:
Secure them all together using a small brad:
Then turn it over and scrunch up each layer individually:
..and unravel each layer to suit.  This is the stage I added my Distress Ink:
..but perhaps you could do that before you start?..
Finally stick on a button with glue in the middle of the flower, with some twine for decoration:
.. I then looked at my finished flower and discovered that the word 'austere' was prominantly positioned on the front of the flower! lol.

Thanks for looking and for any comments,
See you tomorrow,
qwiksave

Wednesday, 11 August 2010

Boy Craft - Badges

Today I made a craft for my boys whilst they were in London enjoying the Science Museum with their dad.  He took them on the train this morning and I had the whole day and evening to myself!  A rare treat indeed. 

What I have made for them are some boy themed badges:
..with my favourite effect on them - distressing!

I didn't make the backs of these, I just used some old ones that  I already had and stuck new fronts on them.  The designs were all from a new set of small stamps I'd purchased in Germany called 'Heroes & Explorers.'

Some of them had a dry brush effect background and to do that this is what I did.  First of all I drew around the old badge so I knew what size I was working with and then stamped my design into it.  Then I used masking fluid (also purchased in Germany but available here) and painted over the stamped design.  When that was dry, I dry brushed over the whole badge area with red paint (it looks orange on the pic, but it is red).  After that paint had dried, I then rubbed off the masking fluid. After sticking the front down I added handrawn lettering & circles and finally inked the edges.

These other badges have Glossy Accents on the characters to give them a 3d effect:
Badges aren't exactly in fashion atm, but I notice that the shop Paperchase have several ranges in.  Not that my boys will worry about being in fashion.  Hopefully they will wear these, maybe on their hat?  They have got a resemblance to Playmobil characters, so maybe that will persuade them.  ;-)

My boys had a great time in London, they visited the 'Ripley's Believe It or Not' Exhibition as well as the Science Museum.  The photos they have taken at Ripley's are a bit gruesome so I'm not going to show you  those, but here they are in Picadilly Circus:

and sitting on the stand of 'Stephenson's Rocket':
Thanks for reading,
See you tomorrow,
qwiksave

Friday, 2 July 2010

Family Gift

You know when you are doing art or a present for someone else, you try and think of what they would appreciate?  In my case its how far can I take the distressing effect without them thinking 'that's a bit scruffy,' lol.  I don't know about how your relatives and friends are, but very few of mine are into art or craft so its difficult for me to give them anything thats not too 'straight', if you know what I mean (hopefully, or I'm just rambling!)  I did try, with this family picture I have made for one of my brothers:


When we met recently, I was sad to hear that he was suffering from depression and I thought I would like him to think his family was thinking of him as he tries to come through it.  So I made him this family picture set  (I have left the tags blank to add some personal journaling). 

The background is foamboard (nice and light for posting!) painted with gold paint first and then blue on the top.  I then added the photos and the buttons.  I was thinking of adding paper flowers but realised that my brother would not appreciate those at all! So buttons it was. Then I started inking the edges of the board and the tags.  I love adding gold to deep blue, its such a rich combination that works so well together.  I could have stopped there, but no, I just couldn't resist adding some more gold, the rub-on transfer scrolls, that ended up being much more shabby than they should have been, because they wouldn't come off where I wanted but other bits came off on parts where they shouldn't.  Maybe it was because I used a pencil rather than the proper tool?  

Seemed to work OK though.  I just covered the errors with more rub ons!

Hopefully the finished piece will be 'straight' enough for him!

See you tomorrow,
qwiksave

Tuesday, 30 March 2010

Altering Time

Another of the crafts I did when I've been off was to alter my kitchen clock.  If you remember a previous ranting post I made a while ago, I mentioned how I wanted to alter my plain, white kitchen clock:
Here is my 'offending' item, just waiting for its transformation...
I took the plastic cover off, distressed round the outside edge with Stazon ink and then stamped the gears into the centre....
..I also inked the inner rim of the clock with a permanent marker..
.
..and there you  have it!

I also added more distressing (ink) to the plastic glass front but it made the clock look more like a dirty workshop clock than a kitchen clock so I wiped it off again. 

I should point out that my house is of the old Victorian type, rather than a modern new build, so it lends itself more to the grungey messy vintage look.

While I'm on, I thought you might also like to see the finished altered bag that I have finally completed:

All I need now is a fun night out to take it to now!
Dazzle, dazzle.

See you tomorrow!

qwiksave x

Monday, 1 March 2010

Altering, Distressing

Whilst looking back at the last month's crafty activities, I realised that out of all the things I have done, distressing and altering things is what I  REALLY like to do best.  I LOVED creating the 'Snow' scrapbooking page, 'attacking' all those edges gave me such a thrill, as did creating the vigorous flourishes on the butterfly card I made a couple of days ago.  I do have a conflict though, its not 'mainstream' stuff, not the type of thing my inlaws or your granny would approve of, or even attempt to understand.  I can hear my inlaws now, 'what's that mess?'  (although, maybe not to my face!)

You see, to me, these are the sorts of work I get excited by:

and
and
(None of which have been done by me, they are all by a very talented New York artist called Seth Apter)

..and I KNOW that this is not to everyone's taste, but this is what excites me and is the kind of area I want to explore further.

I don't necessarily want to distress EVERYTHING but sometimes I look at things around the house (such as the plain white kitchen clock) and think that would look SO MUCH more interesting with some swirls around the edge...

The motivation I got to do this creative activity in the first place was from a lady who's blog I stumbled upon a while ago (through Creative Stamper magazine I think) and I fell in love with all her wonderful journals, her artwork, and her alterations.  Her name is Trish Bee (http://trishbee.wordpress.com/).  Unfortunately she has suffered with ill health recently and has not been able to keep up with her artwork or blog but she has done so much in the past that it is still a fantastic resource and a great inspiration to me.

I've got out all my Tim Holtz craft materials, his book is open and I'm just about to have a play, see where my mood takes me, and maybe I'll have something to show you on here later...

But meanwhile, thanks for listening!  

Friday, 26 February 2010

Simple Stamp Card

Nice simple craft today - a card made by stamping and distressing, my favourite kind of card to make.


I started off in a nice genteel fashion, stamping the pink central decorative part and then added some pink flourishes around the corners and sides.  I then came in with the dark black Versamark ink.  I inked the corners, and then started on making a flourish 'forest'.  It reminds me of the story of 'Sleeping Beauty', the thorn forest growing up and taking over the pretty fairytale castle. 

I used a faded stamp pad to add the shading around the white area and I finished off by adding the butterfly.  I was wondering whether to colour the butterfly in some way, but then thought it would distract from the simple stamp appeal of the card.

Monday, 22 February 2010

Covered Sketchbook and Distressed Envelope

I'm all excited tonight!  I've got my QVC membership and credit card poised ready to buy lots of crafting goodies from the QVC Crafting Day which starts in half an hour!  Tim Holtz and loads of other great sellers are going to be demonstrating some great new products.  Thank goodness I had some birthday money saved from last week!

I've been listening to follower's suggestions!  Quite a few of you suggested I put the vintage Ladybird book picture from yesterday's make onto my blogging notebook so that is what I've done:

I've modernised it by tying lots of coloured ribbons onto the spiral spine, something I've seen others do but never done myself and I love it!  It's so touchy feely now too and inspires me to write in my new ideas book!  
I also did another craft, distressing a personalised envelope:

This would be the type you would give someone by hand, not put it in the post but I enjoyed carrying out all  the distressing and stamping.

Best go, QVC is about to start and I'm on the wrong channel!

Wednesday, 27 January 2010

Transparent Frames for Valentine

Phew!  My hands have been aching today because I have been manipulating wire around some frames with the wrong tool!  Don't laugh but what I grabbed from my husbands tool collection in the cellar were some secateurs rather than pliers - and wondered why I was having such difficulties.  (One of those infamous blond moments without being blond!)  Doh!  I did realise when I'd all but finished...

I was making these:

They were another of those cheapy craft sets from the local pound shop made by Grafix. These were called 'Make your own Mini frames':


They provide plastic squares (which you stick your photo onto the back of, not inside), the heart wire frames and some mini heart embellishments. (They also gave you some paper frames to colour in and some crayons, but I didn't bother with them).  There were also some small bits of wire to hang all the bits together, which you twist into shape.  I have to tell you I could never be a jewellery maker, I took AGES trying to put these rings on, but that may well have been because of trying to use the wrong tool.

The suggestion is to display photos on them, which I did consider, but thought I'd make the most of the fact that they were transparent so would look nice as a window decoration.   Which lead me onto rubber stamping...  I'd got the bird stamps free with 'Craft Stamper' magazine a while ago and had never used them, so here was my chance.  I added some Clear Impressions Love stamps to go with them and my favourite, some swirly flourishes. I used Stazon ink as it stamps quite well onto plastic.


To put them on the window I have got some rubber sucker hooks which are great for lightweight materials.  I first spotted them in shop window displays around Christmas, they were used to stick baubles onto the windows.  I was rather pleased when I noticed my local docrafts shop stocking them and so now I can stick all manner of things (lightweight) on to my windows!:

You could also hang these up or simply pin them to a wall or noticeboard - and change the colour of the background if you wish.  Or maybe  you could give one -or all of them- to someone else as a gift in a nice box.

Friday, 15 January 2010

Distressed Scrapbooking

Today's project isn't a finished project, it is a new technique that I learnt whilst blog-hopping today.  This technique which combines stamping with distressing card, came from an amazing scrapbooking blog I came across today from someone who has only been doing scrapbooking for 2 years.  Her work is incredibly creative and this is the kind of scrapbooking I would like to do one day.

This is the blog - with a video tutorial of how to do the technique (scroll down) and this is the example I made using the technique:


Basically what you do is paint onto the card (or chipboard) with a dark coloured acrylic paint and wait for it to dry.  When it is dry you stamp onto it with embossing ink and sprinkle over it with clear embossing powder, clear off the excess and heat set it.  Then you paint over it all with a light coloured acrylic paint.  After a few seconds, you wipe it over in circular motions with a baby wipe or damp cloth, which reveals the stamped image.  I love distressing effects so I'm pleased to find another one to use. I also distressed the edges of mine too.

It could be used on a card or a scrapbooking page or simply framed as it is and put on the wall or mantlepiece.  It would also look great as a background.

Thanks again to Yatie Tajudin of Malaysia, the fab blogger of 'A Scrapping we will go' (See link in My Blog List, bottom right)
Related Posts with Thumbnails