Welcome to my creative online journal

Showing posts with label altered art. Show all posts

Friday, 29 October 2010

Altered Art Shopping

Today I have a shopping post (as well as a craft). I have not had a shopping post in oh-such-a-long time and felt that both you and I were long overdue. Oh, and what a treat I got today! I had to contain myself from shrieking and jumping up and down in the shop.

There it was. Casually sitting on a display table, minding its own business in the charity shop.
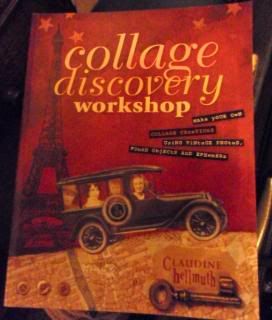
This:
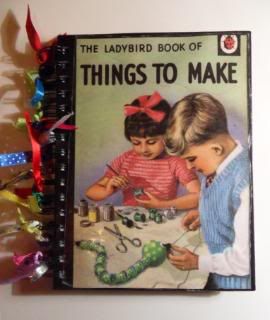
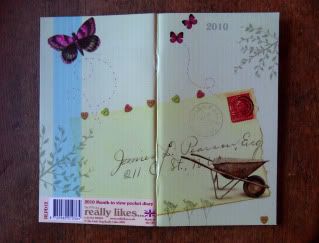
OMGoodness! A practically brand new, fabarooni Claudine Hellmuth collage/altered art book for just £1.50!! Regular followers may remember I got her previous book from a charity shop earlier in the year, for £1.85. I am determined to get more into altered art/journalling and this drawing/collage-y style of Claudine's is so my kind of thing. Woo ... and breathe...

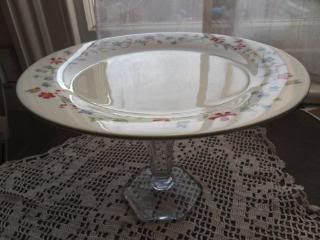
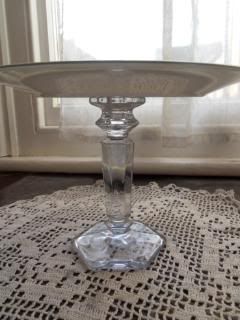
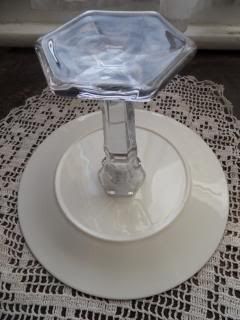
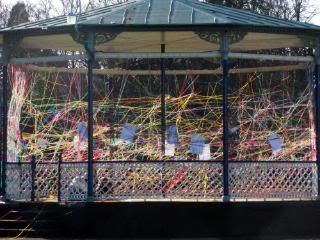
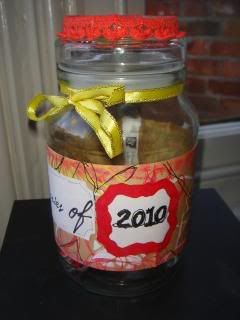
Yesterday, I went to Warwick and bought this back for altering (cost £3.40) - on the bus!:

The things we do for our craft!

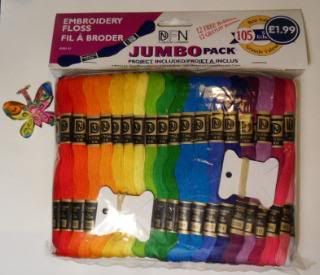
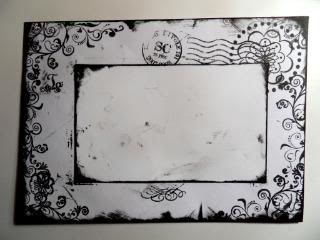
On a 'normal purchase level,' I also bought this fab file (£4):

..which is great for putting my printouts from the 'True Stories' getting-back-to-writing e-course I'm doing at the moment.

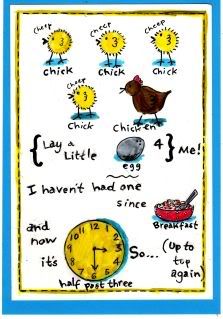
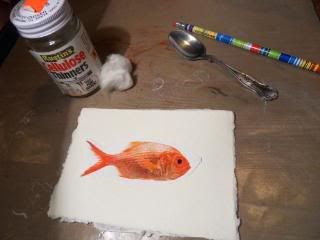
My craft tonight was a Claudine Hellmuth inspired picture:

The violinist is being oh-so-serious playing her violin that she just had to be wearing very silly clothes and the out-of-tune notes add to the tone, I mean theme!

Thanks for reading and for any comments,
See you tomorrow,
qwiksave

Thursday, 26 August 2010

Everything is Beautiful

I'm back to doing some new techniques in my altered book/journal today and this is what I've done tonight:

(The lettering isn't there on the pages yet, I've done a mock up using Picnik whilst waiting for the paint to dry).

To do this technique which I found on a youtube video, I first of all scribbled (that was fun!) using watercolour crayons onto the page (I'm getting braver, I did this technique DIRECTLY into the journal! :-O)
That packet of FAB watercolour crayons had cost me £1.75 from a charity shop a while back.  I'd never used them because I hadn't thought of anything to use them for!

You then wash over the colours with water, blending as you go...
..and the interesting bit, splashing it with Rubbing Alcohol.  Gives a cool resist effect.
I'm thinking I may add some rubber stamps on to the page too and maybe some cut out images.  I will assess it when its fully dry....

(Remember the pages have previously been gessoed which is why they could handle the water colour painting).
* * * * *
I took my boys into town today - I hate doing this as they hate shopping - but at first it was OK because I'd got them those I-Spy Books I spoke about in my Summer Special:
...which kept them amused for a bit...
But botherations, rain stopped play!

Thanks for stopping by,
See you tomorrow,
qwiksave

Friday, 5 March 2010

More UTEE, gobstoppers and chickens!

Thank you for all the interest shown in my blog yesterday, there was a BIG increase in visitors - lots of people showing an interest in how to make the Cake stand.  Welcome to my new followers too, its always nice to have more people on board.

Today I have a few things to show you, the first one is some more altered art, I have been exploring doing backgrounds.  This one uses Tissue paper, brown ink and UTEE:
Difficult to see here but the tissue paper was scrunched up, then flatened, and then brown ink was put over the creases. Looks better in the flesh than on this photo, much more organic.

Unlike these, nothing organic about these!
We have 4 of these old fashioned machines outside our local newsagents.
I like the coloured bouncy balls...
..but not the plastic gifts in these...
..or these! Gobstoppers!  (yuck, think of the hygiene too!)

With Easter coming up I've thought of something for the children (big or small) to enjoy:

He, he! Although this is something the older ones amongst you may recognise even more than the young!  Maybe those of you that know it could sing it to the young (doing the actions), its fun!  My eight year old enjoyed it but he is old enough to be able to read and do it for himself! :-)

Thursday, 4 March 2010

Plate Stand and Bargain!

I carried on working with that piece I started yesterday (see previous post) and now its very different from how it looked yesterday.  I threw everything at it (in true Tim Holtz style) including some stamped flourishes and even covered the whole thing in UTEE for good measure.  I had fun...but the end result was a bit dark so I haven't even got  a photo of it to show you.  I'm sure they'll be many more in the months ahead anyway....

What a lovely Spring like day it was today:
Almost felt like skipping through these, but it was still a bit chilly despite the sunshine!

This project is one I have been discussing on the Christmas Craft thread on MSE - it is a cake stand made simply from a plate and a candlestick!

I found the idea on the Oh So Crafty blog so thank you to Tricia for this. 

Here is my finished cake stand:
All I did was use Araldite glue to join the glass candlestick to the Porcelain Plate.
This was the plate (Royal Doulton, £1.50 from a charity shop):
..and this picture shows the glass candlestick (£3.50 charity shop) a bit more clearly:
...and this is it upside down showing where I joined the candlestick to the middle of the plate.
I used the writing on the bottom of the plate as a guide to find  where the centre was.

I was going to make some cupcakes to display on my plate but found I hadn't got enough flour so will do that another day now...but all in all a very easy and satisfying project to make.

Finally today, I thought you'd like to see one of my purchases that I got today (the other was a dish washing brush, not very exciting!) because if you have got a 'Works' shop nearby you might be able to get one of these for yourself. 

It's this:
105 (this pack is 5 layers deep) Embroidery threads for just £1.99!
They look so colourful in their packaging I hardly want to open the pack! 

qwiksave x

Monday, 1 March 2010

Altering, Distressing

Whilst looking back at the last month's crafty activities, I realised that out of all the things I have done, distressing and altering things is what I  REALLY like to do best.  I LOVED creating the 'Snow' scrapbooking page, 'attacking' all those edges gave me such a thrill, as did creating the vigorous flourishes on the butterfly card I made a couple of days ago.  I do have a conflict though, its not 'mainstream' stuff, not the type of thing my inlaws or your granny would approve of, or even attempt to understand.  I can hear my inlaws now, 'what's that mess?'  (although, maybe not to my face!)

You see, to me, these are the sorts of work I get excited by:

and
and
(None of which have been done by me, they are all by a very talented New York artist called Seth Apter)

..and I KNOW that this is not to everyone's taste, but this is what excites me and is the kind of area I want to explore further.

I don't necessarily want to distress EVERYTHING but sometimes I look at things around the house (such as the plain white kitchen clock) and think that would look SO MUCH more interesting with some swirls around the edge...

The motivation I got to do this creative activity in the first place was from a lady who's blog I stumbled upon a while ago (through Creative Stamper magazine I think) and I fell in love with all her wonderful journals, her artwork, and her alterations.  Her name is Trish Bee (http://trishbee.wordpress.com/).  Unfortunately she has suffered with ill health recently and has not been able to keep up with her artwork or blog but she has done so much in the past that it is still a fantastic resource and a great inspiration to me.

I've got out all my Tim Holtz craft materials, his book is open and I'm just about to have a play, see where my mood takes me, and maybe I'll have something to show you on here later...

But meanwhile, thanks for listening!  

Monday, 22 February 2010

Covered Sketchbook and Distressed Envelope

I'm all excited tonight!  I've got my QVC membership and credit card poised ready to buy lots of crafting goodies from the QVC Crafting Day which starts in half an hour!  Tim Holtz and loads of other great sellers are going to be demonstrating some great new products.  Thank goodness I had some birthday money saved from last week!

I've been listening to follower's suggestions!  Quite a few of you suggested I put the vintage Ladybird book picture from yesterday's make onto my blogging notebook so that is what I've done:

I've modernised it by tying lots of coloured ribbons onto the spiral spine, something I've seen others do but never done myself and I love it!  It's so touchy feely now too and inspires me to write in my new ideas book!  
I also did another craft, distressing a personalised envelope:

This would be the type you would give someone by hand, not put it in the post but I enjoyed carrying out all  the distressing and stamping.

Best go, QVC is about to start and I'm on the wrong channel!

Saturday, 20 February 2010

Image Transfer and Colourful Bandstand

My craft today didn't go to plan.  I was working with image transfers and most of what I tried failed to give me the desired result.  Never mind, I just know I need to do some more (fun!) experimenting...

I was inspired to do the image transfers by this book I got today:
Collage Discovery Workhop by Claudine Hellmuth (£1.85 from a charity shop!)

Admitedly, I haven't had chance to read it yet but I remember years ago doing a successful transfer of  a picture from a magazine I had of Elvis Presley.  So I tried the same method - which was using Cellulose Thinners - and it didn't work that well.  Maybe it depends on what type of newsprint the picture is on, they vary so much:

My set up showing picture I was going to copy::
You put your picture, image side down onto the paper (today I used posh Cotton paper from Paperchase) and with cotton wool soak the back. with the Cellulose Thinners.  Then use a pencil to draw over the back of the image.  This was the best result I had:
(The picture in front was the original I was copying)

I also tried a picture that was on newspaper but that didn't work at all.   Think I need to study that book! :-)

Other news and while passing our town bandstand today I was surprised to see it was all wrapped up in lots of different coloured yarn!:


It looked lovely in the sunshine!  It was part of some children's art project, but on passing later I noticed that it was all gone and put back to normal.

Thursday, 7 January 2010

Dates to Remember!

I occasionally forget events and things I'm supposed to remember like returning library books or school holiday dates- so the item I've made today should help me.

It's an 'Important Dates' coaster calendar for my notice board:


I got the idea of the coaster calendar originally from someone on my favourite forum MSE, who got it from someone else...

I made one in December, a 'shabby chic' one that I was going to give to my son's teacher but in the end wasn't sure that she would appreciate it. I'm glad that I didn't give it away though because I like looking at it on another of my noticeboards!


They are made by covering a beer mat (you can BUY these from ebay apparently!) with patterned paper, gluing on a calendar and adding embelishments like flowers and ribbon. The one that I made today (top pictures) was also outlined with a black marker pen.

Wednesday, 6 January 2010

Diary in a Jar

If you are like me and start a diary at the beginning of each year faithfully writing in everyday.... and then by the 3rd week abandon it because it is so time consuming then you will love this idea - a memory jar. You don't write in it every day, you just write (on strips of paper that go into the jar) on the days that you want to remember.


Simple to make, just decorate a glass jar to suit your own taste. I used scrapbooking paper that was cutomised with a swirl stamper (I loooovvve swirls!), homemade labels, a paper flower with a button and some ribbons. Strong DST (Double sided tape) sticks it all together.

You could also make one for someone else as a gift.

Saturday, 2 January 2010

Duvet Diary and Bookmarks

For todays project I recovered a new diary and made some bookmarks using the cover of my duvet!:


Not literally, lol! I photographed the duvet with all its interesting creases and crumples and uploaded the resulting image into an online photo editing program. I do recommend this program (called Picnik) as it is excellent for being creative with your photos and a good deal of it is free too. Using the 'Boost' control really helped bring out the beige and blue colours in the duvet. I then added the date (2010) using a Picnik fancy font, printed it out onto A4 plain paper and stuck it onto the diary.

This is a photo of the duvet (bought from Next a LONG time ago!) before:


The diary I used did have a nice image on it before I changed it - if you are a gardener that is! (and if you want one they are still available at the time of writing on a site called thelittledog) but I really like the decorative style of calligraphic script which is why I changed mine.

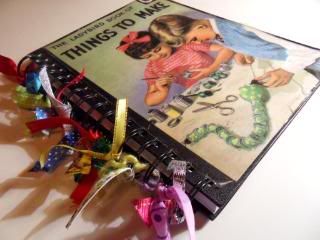
I then made the matching bookmarks out of the offcuts using a laminator, hole punch (Big Bite)and decorative ribbon.

All I need now is a fancy fountain pen and I'm all set up!
Related Posts with Thumbnails