Welcome to my creative online journal

Showing posts with label image transfer. Show all posts

Thursday, 2 December 2010

Transferring Christmas Images onto Felt

As is quite often the case, because I am not very organised you have caught me mid-craft!

Today I've been experimenting with making transfers of photographs onto felt. 

It was successful!

I've tried three images tonight, two of which will probably make christmas cards and the other a piece of artwork.
I used computer fabric transfer paper and ironed the images onto some white felt.  I then cut round the image with scissors.  (Both of these images were taken last February, we haven't got that much snow round here yet!) 

The third image isn't particularly chrismassy, but it was fun to start 'playing' with it, once it had been printed.
It's still wet but hopefully you can get the idea.  The image is of a cobweb covered in frost and I have extended the image onto a second piece of felt (green) using glitter glue to make it sparkle.  I also put some glitter onto the plastic spider left over from Halloween.

The possibilites of this technique could be extended into mixed media - including using my sewing machine (Gasp!) - once I have found out how to turn it on that is, lol.    It appeals to me to redo my boring wedding album into all mixed media.  I'm thinking I could transfer copies of all the photos onto felt or other material, stick them onto canvas paper and add all sorts of embellishments.  I was very inspired by the one made by Julie Fei-Fan Balzer of  Balzer Designs  Fab stuff!

Thanks for looking and for any comments,
See you tomorrow,
qwiksave

Sunday, 19 September 2010

Awaiting my Craft

I am still in the process of doing tonight's craft - I am looking for an image on the web of some pedestrian crossing lights.  Why? You may well ask.  Because my husband [who has returned to work in China today :-(  ] and I have a little jokey thing between us about our younger son who, whenever we ask him to do something, invariably will keep saying, 'Wait', while he finishes off a stage on his computer game or something.  We decided that we would make him a t-shirt that has the 'WAIT' symbol on it (hence the pedestrian crossing image) as an in-family type of joke.

I have, however, been having difficulty getting a Copyright Free picture of the pedestrian lights, which is why I am still searching.  While I have been looking for them though, I came across this great image:

What an enormous traffic light 'tree!'

This is the type of image I'm looking for, but this one is of such a diddy size that it wouldn't be suitable for printing on a shirt:
So I shall plough ever onwards in my quest!

BREAKING NEWS.....Paperchase have got a brand new website with shopping! Yay! Shipping Worldwide.

Thanks for stopping by and hope you've had a great weekend,
See you tomorrow,
qwiksave

Saturday, 28 August 2010

Image Transfer on Canvas

I've had another go at image transfer tonight (phew, the fumes!) using Cellulose Thinners.  I didn't give myself enough time to do enough experimenting and I think if I had more time I would get more successful results. 

This was one of the effects:
I don't know if you can just about make out a profile of a face there, I decided to try doing my transfer onto canvas paper this time to get a textured effect.
This was the original image I used - and of course you get the image reversed.  Something to bear in mind if you want to use text.
Here they are side by side.  I actually like the pencil lines texture that it gives to both images.

The transfer may have been stronger if I had done the transferring onto plain paper rather than canvas - or maybe used a different type of magazine print.  More experimenting needs to be done I think.

To do this particular technique I applied some cellulose thinners directly onto the image with a foam sponge brush, turned it over onto the canvas and scribbled on the back with a pencil. 

I also tried it with a tomato image:

and again the transfer is a bit subtle but I am liking the 'magic' scribble effect it gives.

Thanks for reading,
See you tomorrow,
qwiksave

Monday, 28 June 2010

Image Transfer

I decided to have another little go at magazine image transfer as my craft today.  I had a look on google and there is a little discussion about it on UKScrappers.

What I did was stick clear wide parcel tape (from Sainsbury's) onto the magazine picture and cut around the image loosely.
I then used a small ruler to burnish the tape onto the picture and then soaked the picture in water (do you like my banana bowl?)
After a little while I rubbed the back with my finger to remove the backing paper
But unfortunately a vital part of my image (the computer mouse) came away too so I will need to do some more research on this (I expect there will be some videos on youtube) or stick to other methods (such as the Cellulose Thinners transfer technique).  With this clear parcel tape method you are meant to be left with a transparent image of your original picture.  Hopefully it will work for me...next time!

See you tomorrow,
qwiksave

Saturday, 20 February 2010

Image Transfer and Colourful Bandstand

My craft today didn't go to plan.  I was working with image transfers and most of what I tried failed to give me the desired result.  Never mind, I just know I need to do some more (fun!) experimenting...

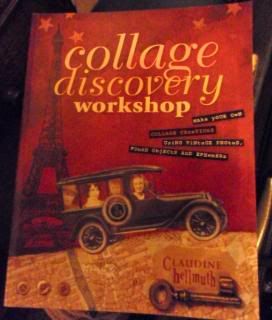
I was inspired to do the image transfers by this book I got today:
Collage Discovery Workhop by Claudine Hellmuth (£1.85 from a charity shop!)

Admitedly, I haven't had chance to read it yet but I remember years ago doing a successful transfer of  a picture from a magazine I had of Elvis Presley.  So I tried the same method - which was using Cellulose Thinners - and it didn't work that well.  Maybe it depends on what type of newsprint the picture is on, they vary so much:

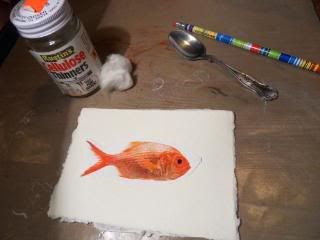
My set up showing picture I was going to copy::
You put your picture, image side down onto the paper (today I used posh Cotton paper from Paperchase) and with cotton wool soak the back. with the Cellulose Thinners.  Then use a pencil to draw over the back of the image.  This was the best result I had:
(The picture in front was the original I was copying)

I also tried a picture that was on newspaper but that didn't work at all.   Think I need to study that book! :-)

Other news and while passing our town bandstand today I was surprised to see it was all wrapped up in lots of different coloured yarn!:


It looked lovely in the sunshine!  It was part of some children's art project, but on passing later I noticed that it was all gone and put back to normal.
Related Posts with Thumbnails