Welcome to my creative online journal

Showing posts with label retro. Show all posts

Sunday, 6 June 2010

Retro Clipboard

For today's project I've made a clipboard out of thick cardboard that I have covered with retro styled, flower power patterned paper:

I used a bargain pack of book covering paper, 3 sheets for 99p from The Works.  It's title said 'Self Adhesive' but it wasn't! I made sure mine was flat though by using spray adhesive.  When I'd stuck it on I thought it wasn't retro enough so I used an old nail file to distress all the edges.   I stuck some flower and bee peel-offs on the bulldog clip and ribbons were tied on to give it more of a funky feel.  A Big Bite was used to set a grommet into the corner but it won't stay so I may have to stick that on with Superglue.  Finally a  pencil was attatched onto ribbon threaded through the punched hole and there you have it, a funky clipboard.

Seeing my family today was fun, catching up and reminiscing. We still cajole and poke fun at each other, just as we did when we were kids.  It does make me realise that I must start to document my memories though, scrapbook what I have about my parents and give my two brothers and sister a copy.  It would also be something for my children and theirs....

See you tomorrow,
qwiksave

Tuesday, 16 March 2010

Hippy Birthday

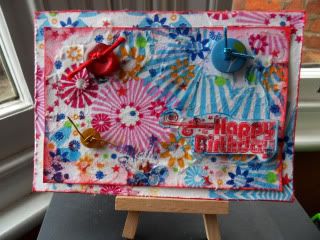
I managed to stop my sort out of the attic space long enough to make a birthday card today:
It's for a friend who is in her 40's so I think she will appreciate the retro look of this.
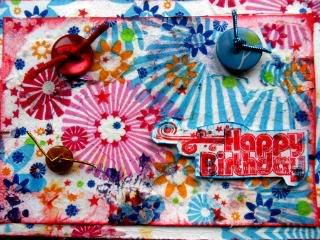
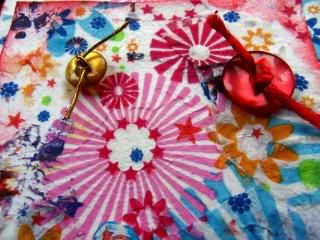
Here are some close ups:
The buttons and the 'Happy Birthday' have been put on with stickydots
..and I made the background out of Tesco napkins - just £1 for a pack of 20.

I stuck a napkin onto card with a pva & water mix and then because I was impatient, dried it with my heat gun.  I added random splodges of inks and then inked the edges with a red ink pad.  After that I stuck another napkin down onto the background card with spray glue and cut around the edge to fit. Finally I added the buttons with matching ribbons and the stamped and Glossy Accented 'Happy Birthday' to the main image and stuck that down onto the card with some more spray glue.  As a final touch I distressed the whole card with scissors and inked the edges too.

What a feast of colour and texture! Hope my friend enjoys it as much as I do!

qwiksave x

(This was a modified post from yesterday)
Related Posts with Thumbnails