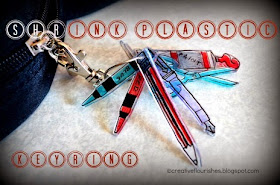
This is what I made:
I have a travel art bag (shown in detail in this blog post) so this would be ideal to add to the zip pull.
This art equipment keyring wasn't what I planned when I first got out the shrink plastic. That was to colour my none-art equipment themed shrink plasticables (made up word) with alcohol inks.
The first theme I had was made up monster-y characters that I had drawn in my sketchbook many moons ago.
On the left are the pictures that were traced on to the clear shrink plastic with a fine black Sharpie.
I poured various colours of alcohol ink onto a craft mat and smooched the cut out plastic monsters in it. Mixing colours I thought would add interest... but when they came out from the oven...
...I didn't like the result and was going off the idea of monsters anyway. Where would I put them..?
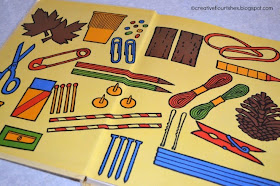
So, I found myself a children's vintage craft book, called '365 Games to Make & Play' (from 1979!) and spotted these stationery images on the opening pages:
...which were perfect for tracing and shrinking. A tip I remembered reading on Pinterest was to sand the back of the shrink plastic before colouring, and for this I used an emery board. I also punched out a hole in each piece, before cooking, with my Crop-a-dile.
The stationery/arty items were coloured with Sharpies and the very bright monster-y characters shown here on the right with Neon Pro-makers:
..And another 'Now' art technique can be crossed off the list, what's next?...(checks list)...Hama Beads....
See you next time, thanks for stopping by,
Nicky
Creative Flourishes


Thanks for sharingg this
ReplyDelete